My Understanding of Blogdown & Github
As seems to be Blogdown tradition my first blog post using blogdown is a quick and dirty guide for getting a blogdown site off the ground. The My Understanding of series is my attempt at writing concise guides for my future self on how to do complicated or infrequent jobs. This page is about creating a website using Blogdown from scratch, which I’ve always found to be a very obtuse process that frequently runs into errors not explained in tutorials/guides. I don’t plan on explaining the benefits of blogdown (though look here for that https://bookdown.org/yihui/blogdown/ ) or comparing blogdown to other ways to make website. I’m fairly sure there are objectively easier ways to make a blog or website than using blogdown UNLESS your site is about R. I will also not be demonstrating how to add content or customize the site on this page. If it ends up such that you do not feel like this guide has been completely helpful I have a resources section at the bottom with other tutorials and information about blogdown. I myself used other tutorials to make this happen in the first place.
If you happen to not be me there are a few things that one should already know how to do before starting this process. The most important of which is already having a solid understanding of R and R Studio. Other than that its mostly making online acounts and pressing buttons.
Getting the Blogdown Package
Aquiring the blogdown package is as simple as aquiring any R package install.packages(“blogdown”). You will be asked if you want to install Hugo, say yes because hugo is important. One thing of note is that installing blogdown will give a shiny new ‘addins’ button with many of the blogdown function (serve site, new post, etc) that you can use as an alternative to running commands.
#code used:
install.packages("blogdown")
Creating a Local Site
Once blogdown is installed we’re going to make a new R studio project. When starting the project in a new/existing directory under ‘project type’ you’ll be able to select ‘website using blogdown’. When the project files are created it’ll come with a config.toml file that you can make changes to to customize your site.j
1of5 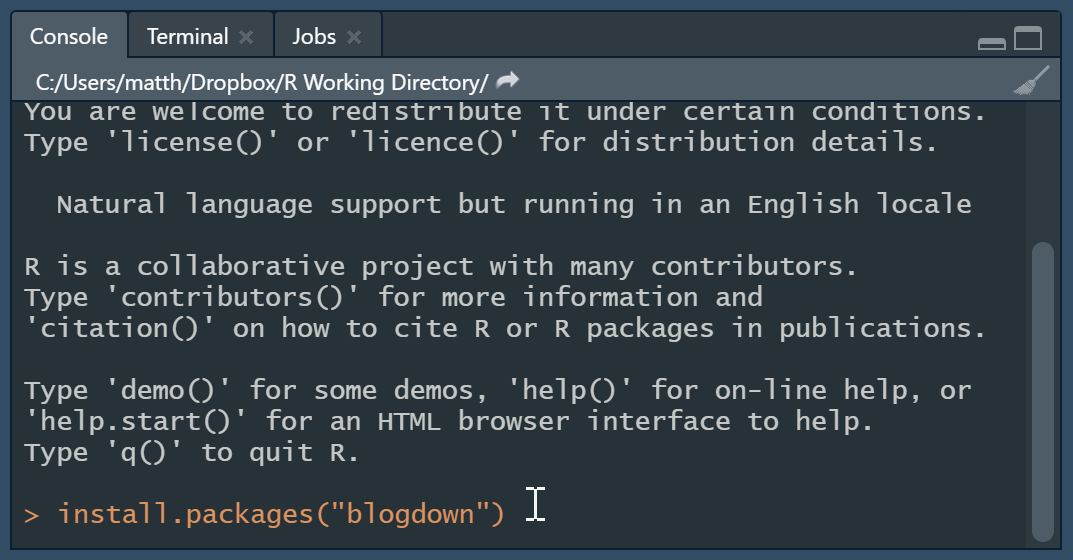
2of5 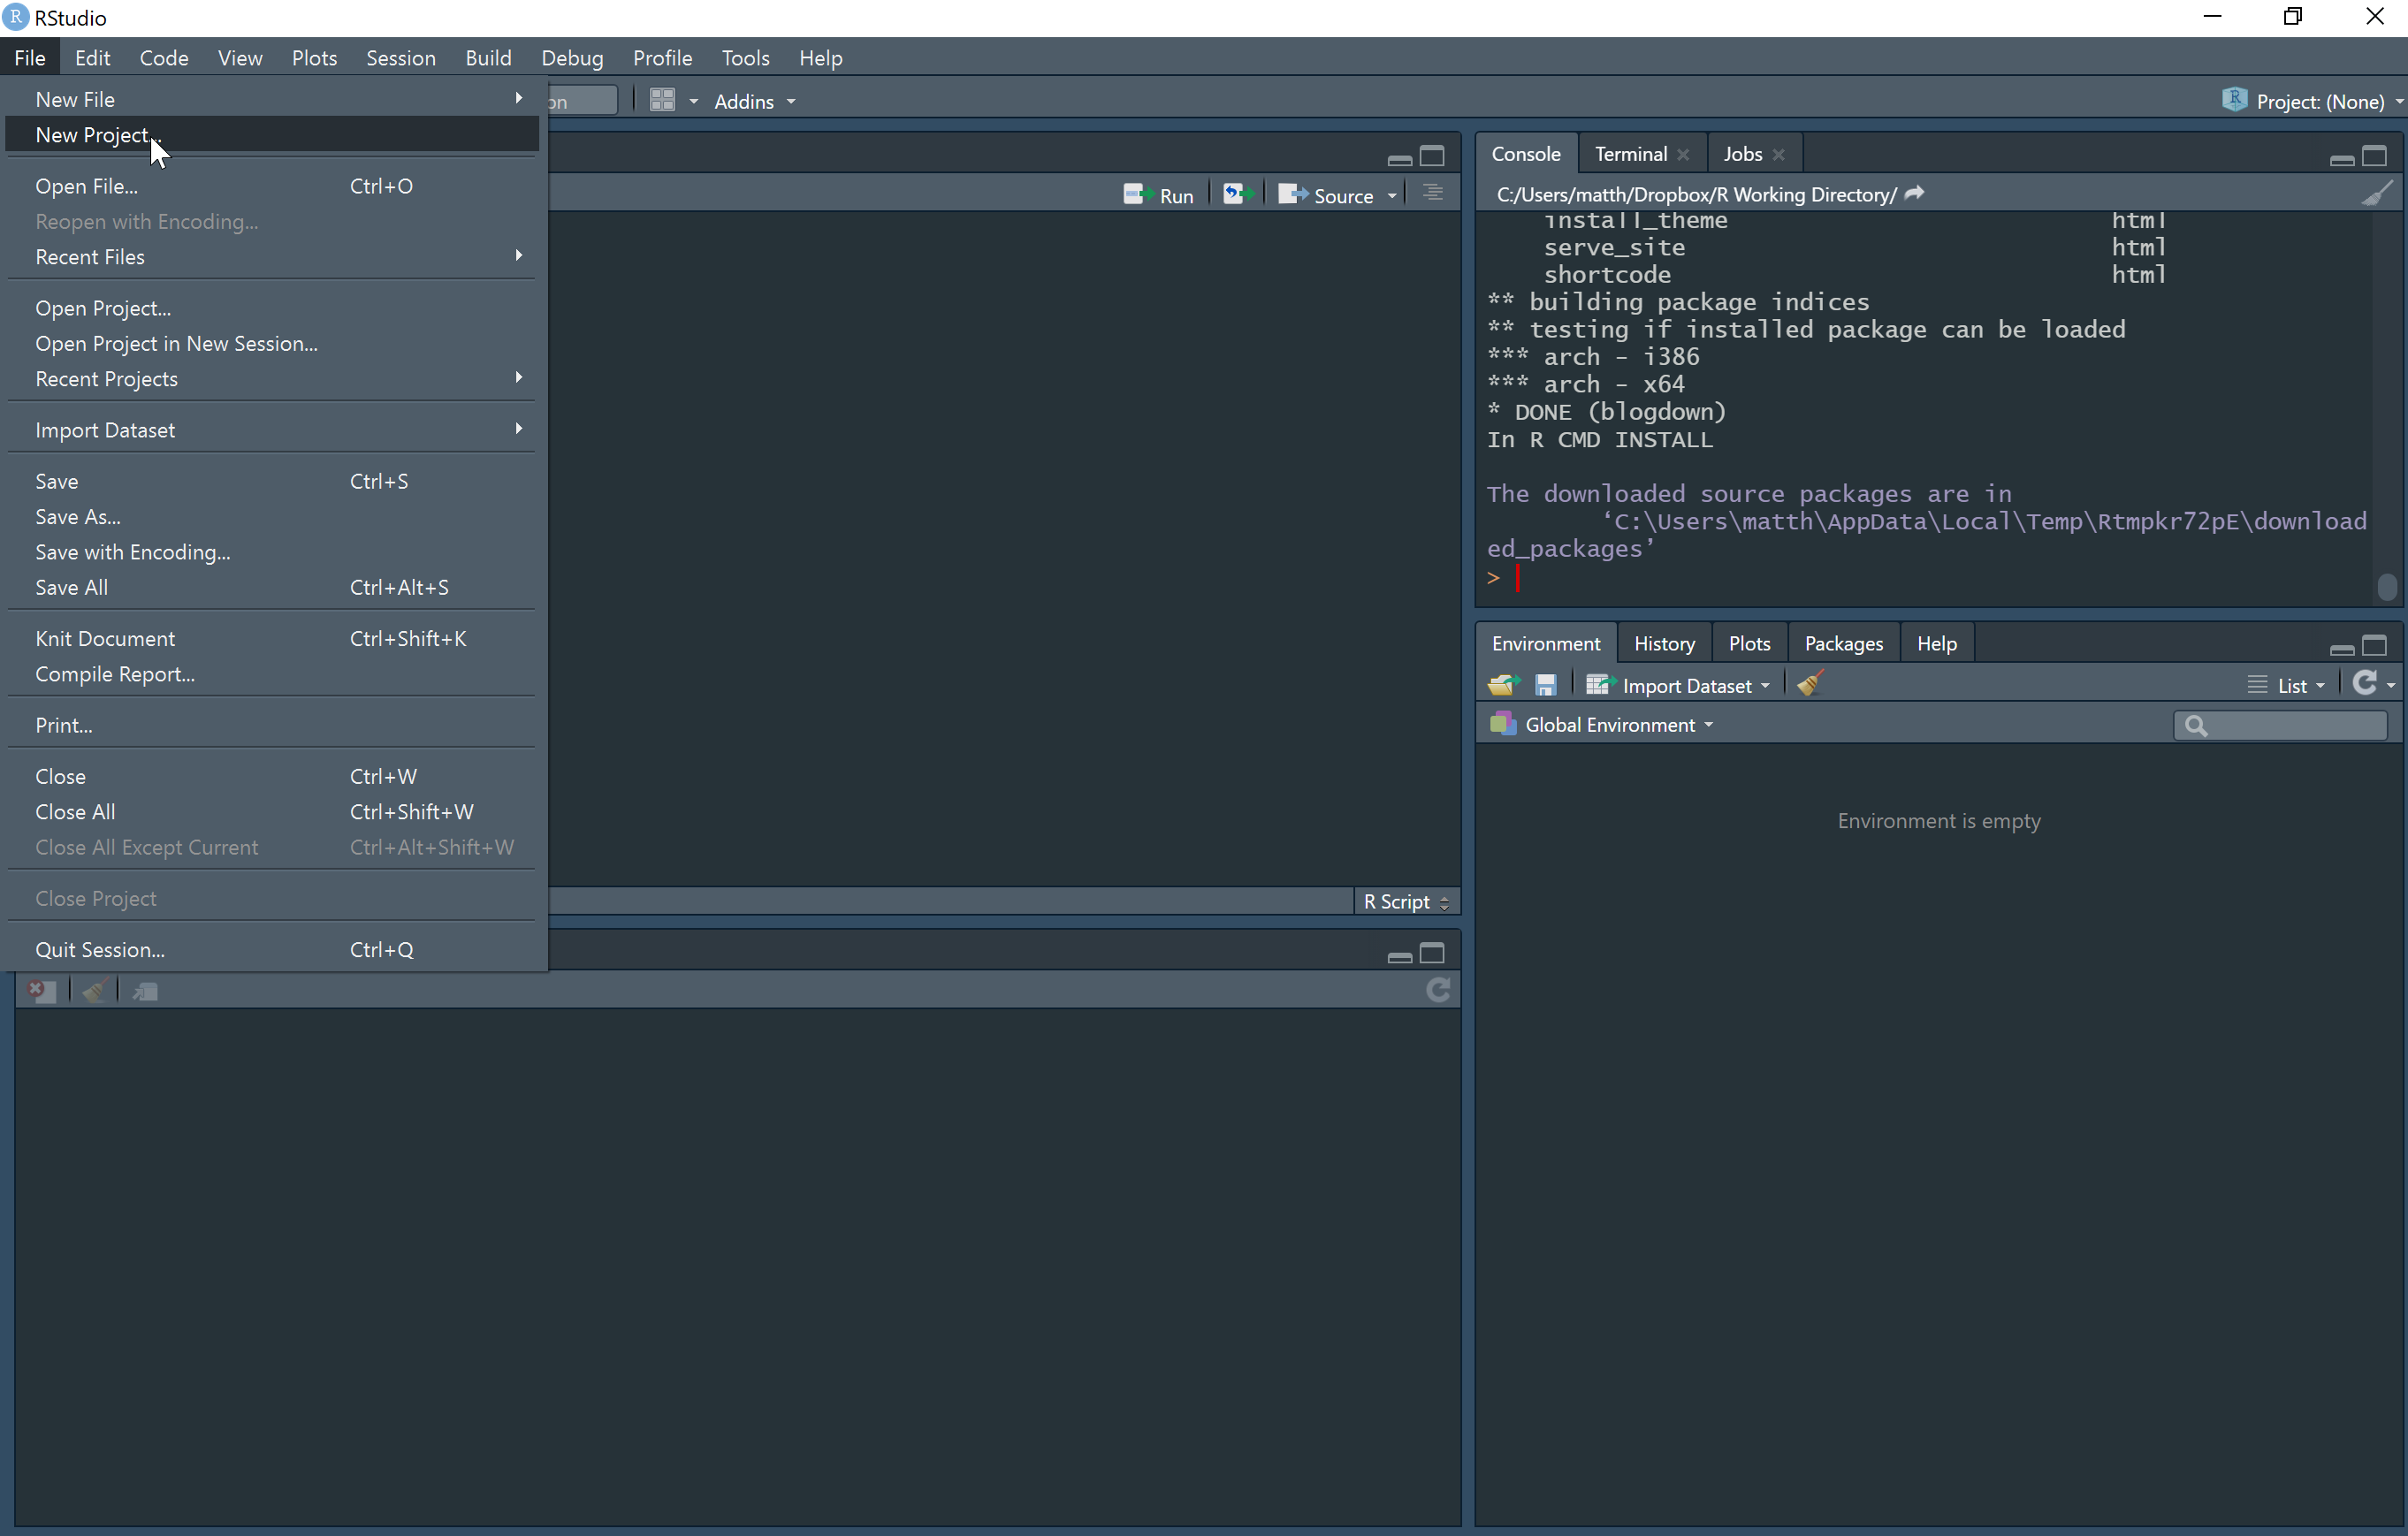
3of5 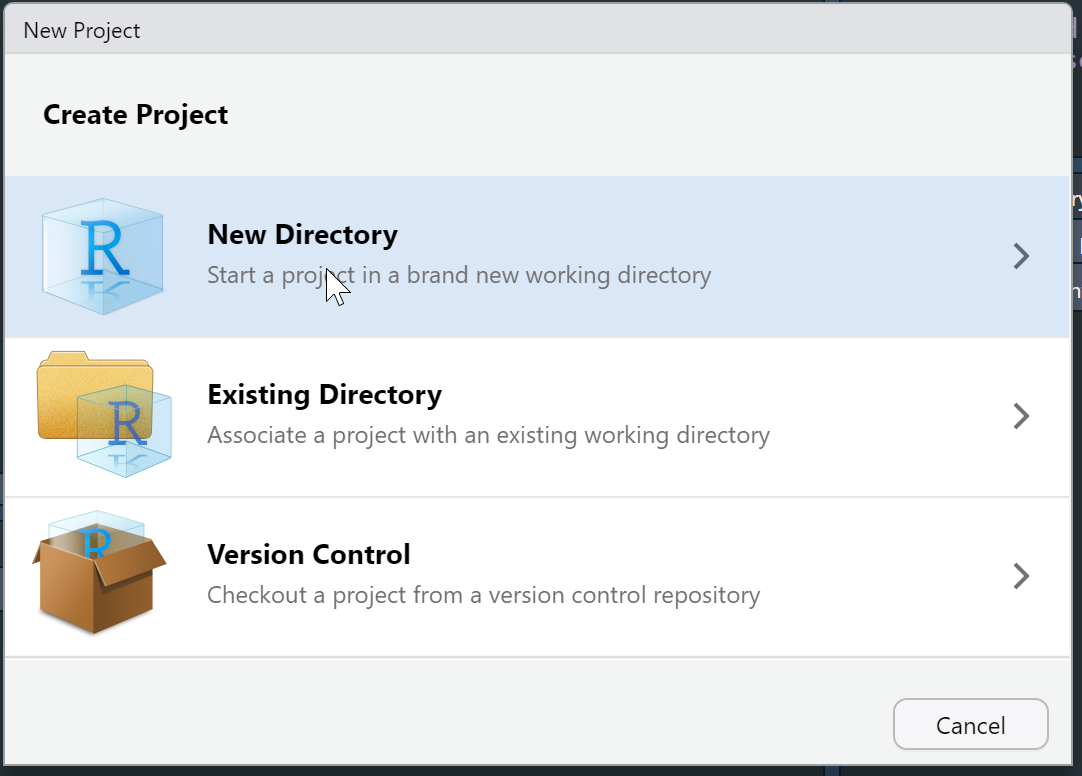
4of5 
5of5 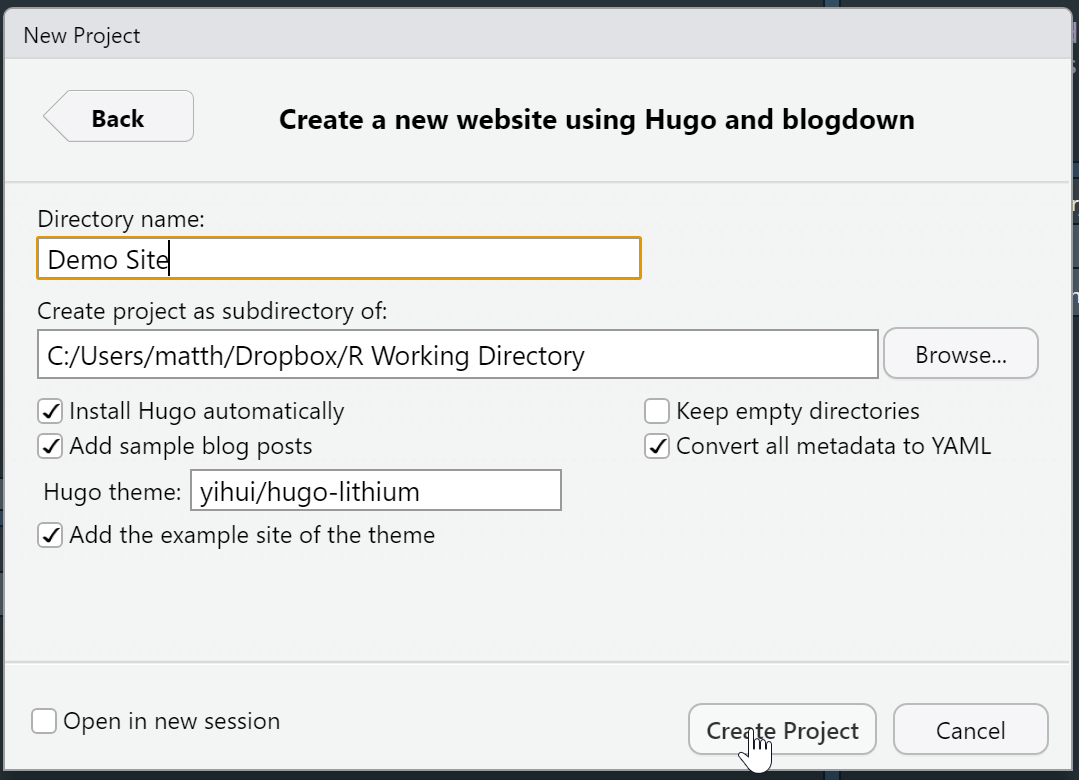
This demo site is what we’ll be launching to the internet (I’ll explain in another page how to add content and such). We’re also going to need this package loaded so library() from the terminal. But when we made the site nothing happened, we have to serve the site, with blogdown::serve_site() which can be done from the addin menu or console. This will open up the site for us to explore in the file viewer (I increased the size of my viewer for visibility). Right now it just has a couple of demo posts but I’m sure you have some great ideas of how you can add to that. Right now the site only exists on our computer so we’ve got some work to do before it can be seen by everyone.
library(blogdown)
blogdown::serve_site()
1of2 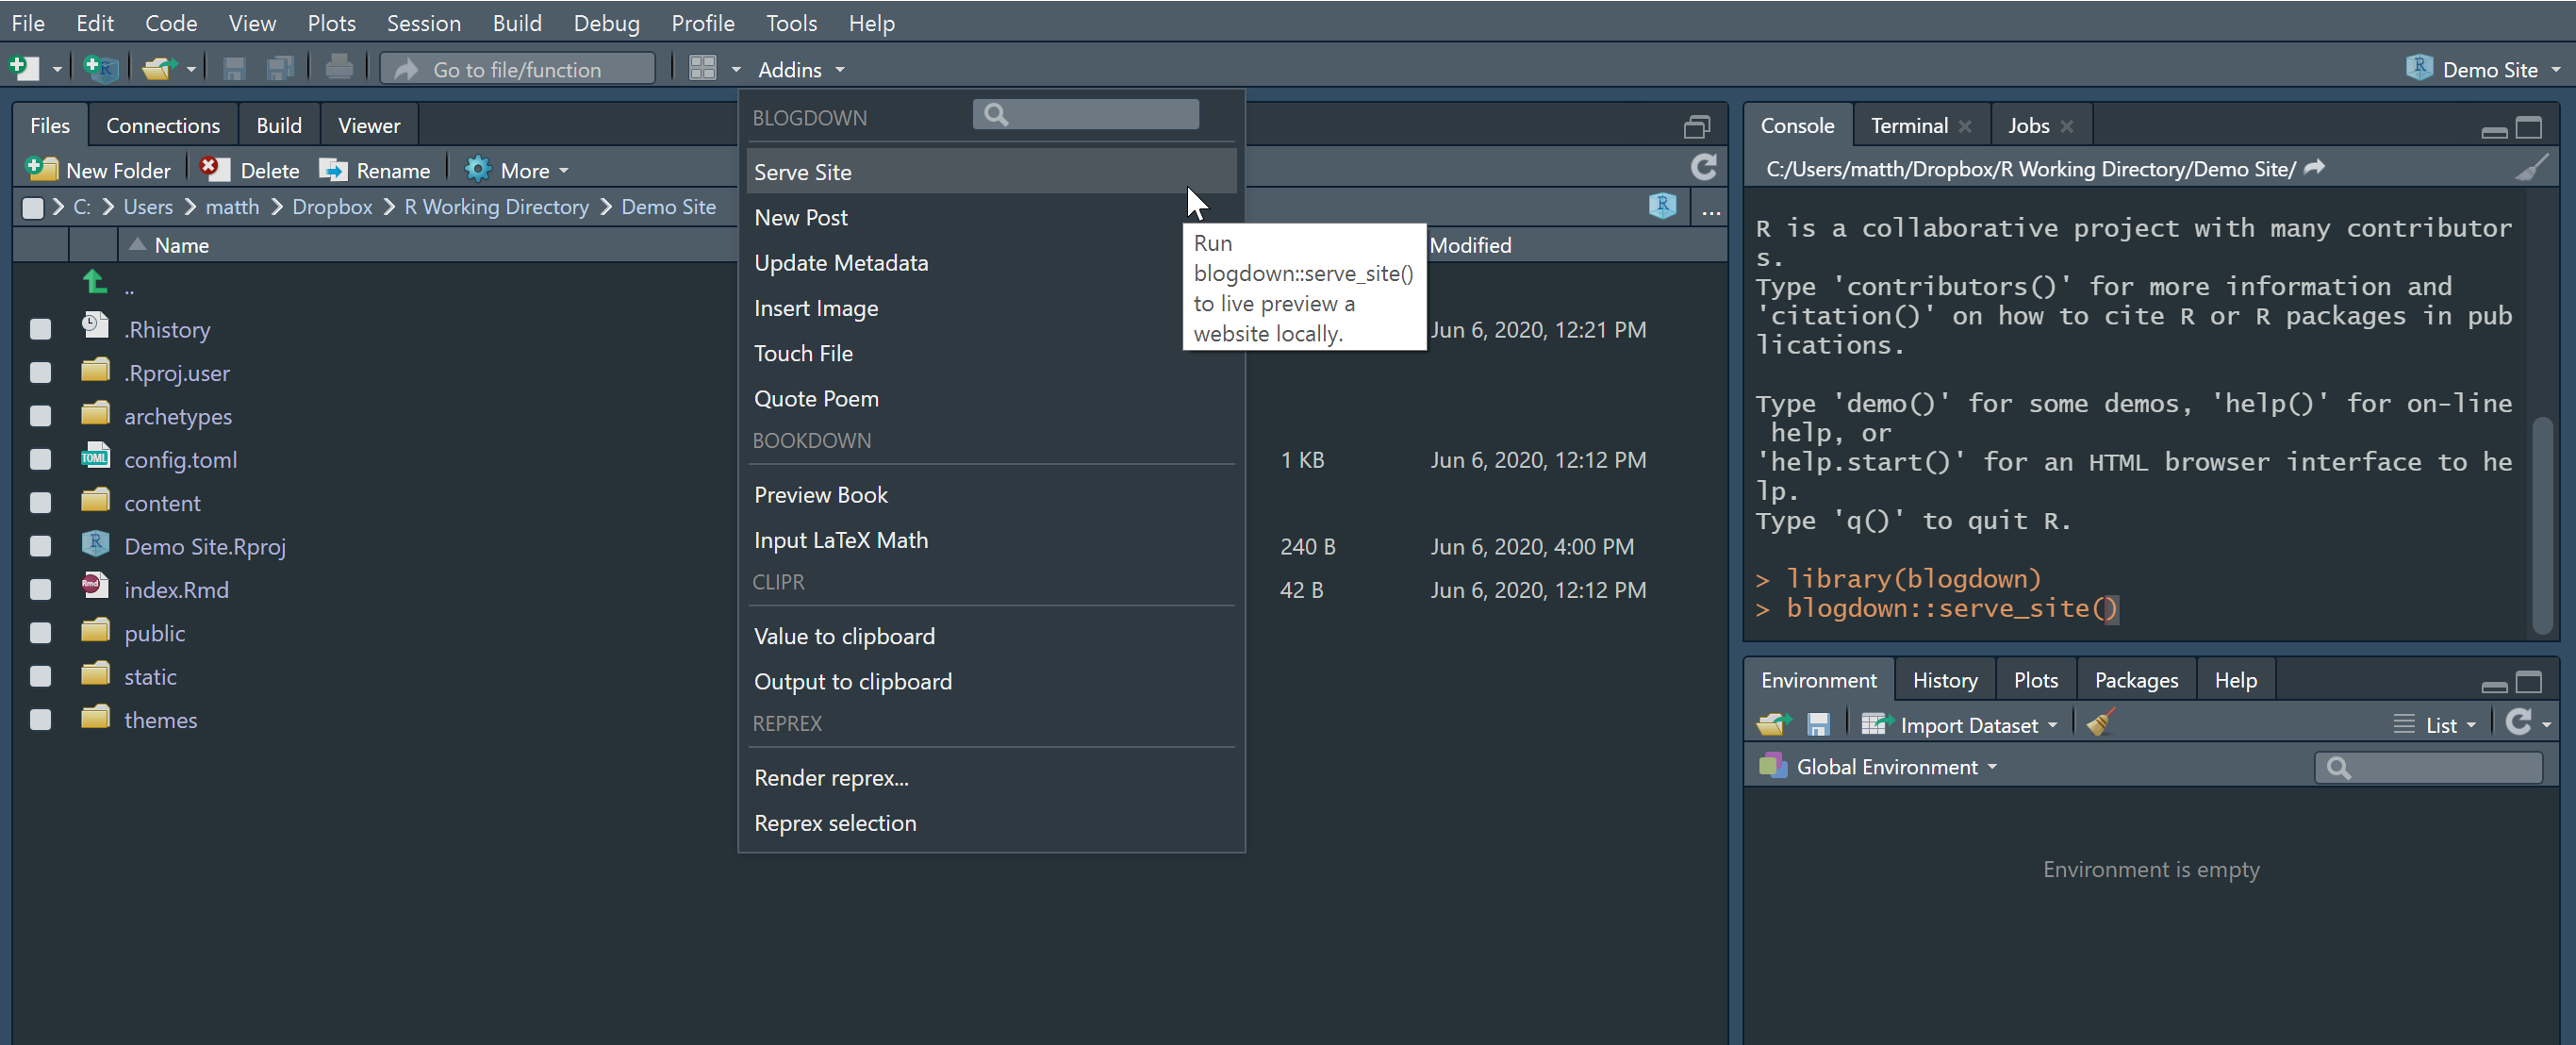 2of2
2of2 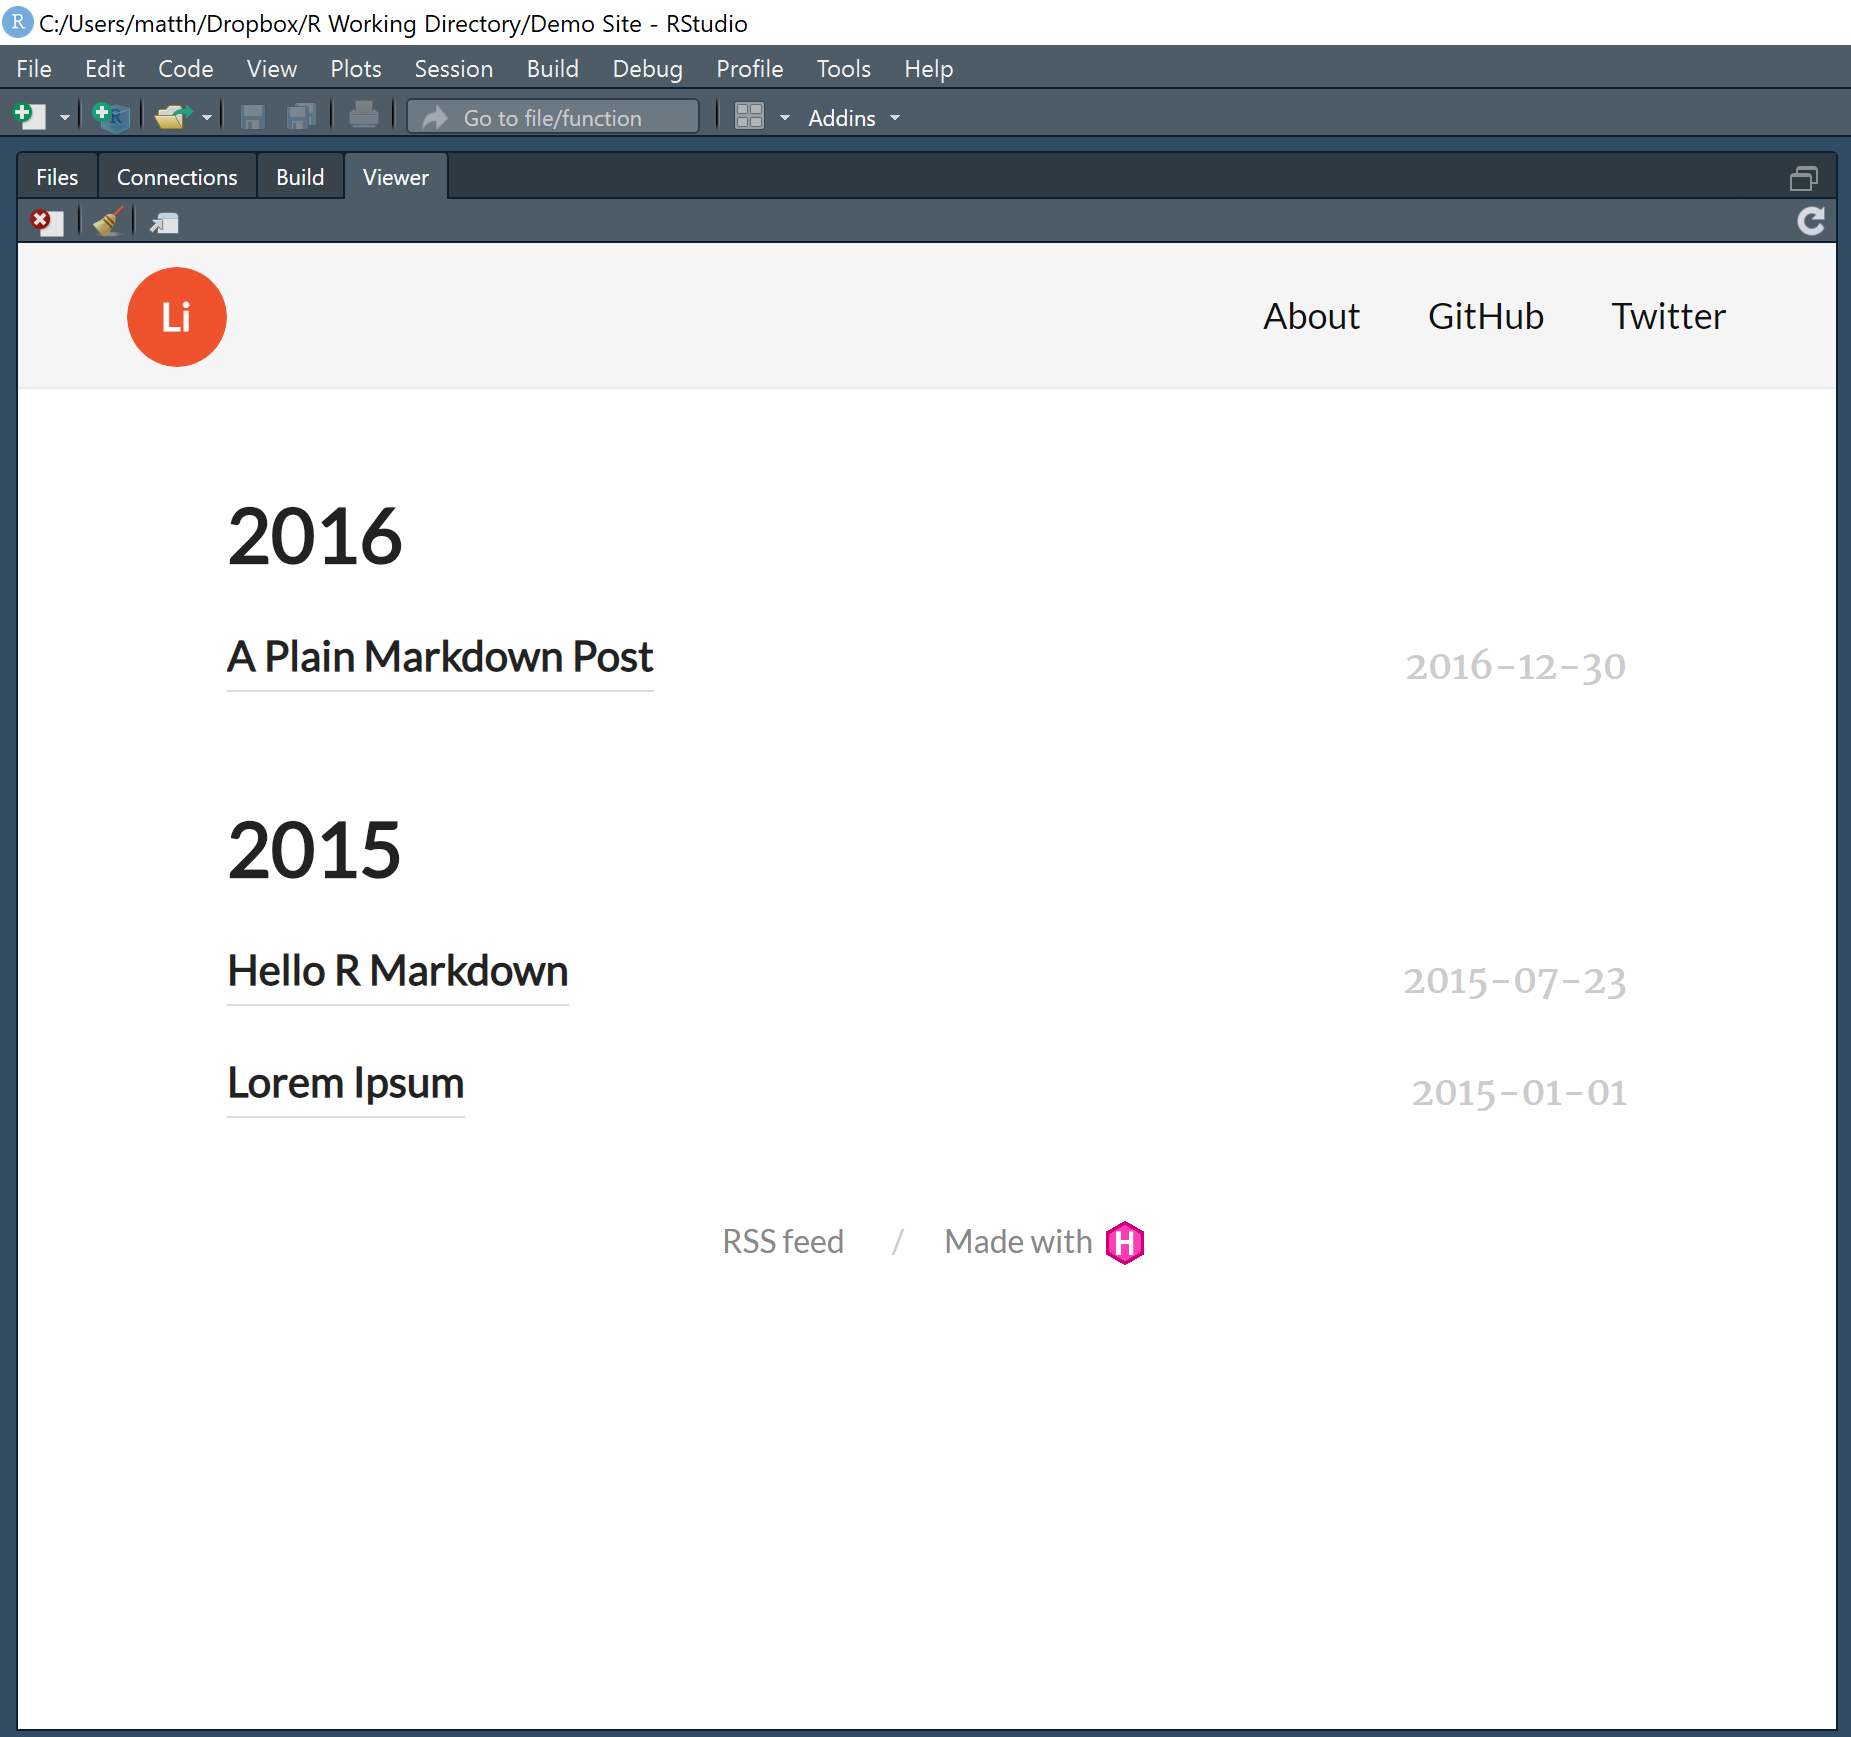
Have Github
For this step you’ll be going to https://github.com/ and making an acount with them. This is how we’ll be getting the site files off of your computer and accessible to the internet (for netlify)
Upload Your Site to Github
Now according to most of the tutorials I looked at this is supposed to be a pretty simple process. However they seem to have left out some steps that caused me problems. I will be mentioning these problems as well as how I managed to evenually kill the problems.
Our first step is to get your existing local site onto github by making a new empty repository on github (you don’t need a readme or gitignore to start). When you create a new repository there’s no need to adjust options beyond the name. After creating the repository it brings to several options such as “quick setup”, “creating the new repository on the command line”, “pushing an existing repository from the command line”, or “importing code from another repository”. The option that we will care about is creating the new repository on the command line. It may be convienent for you to copy/paste the code shown on github into a safe notepad or similar location.
1of3 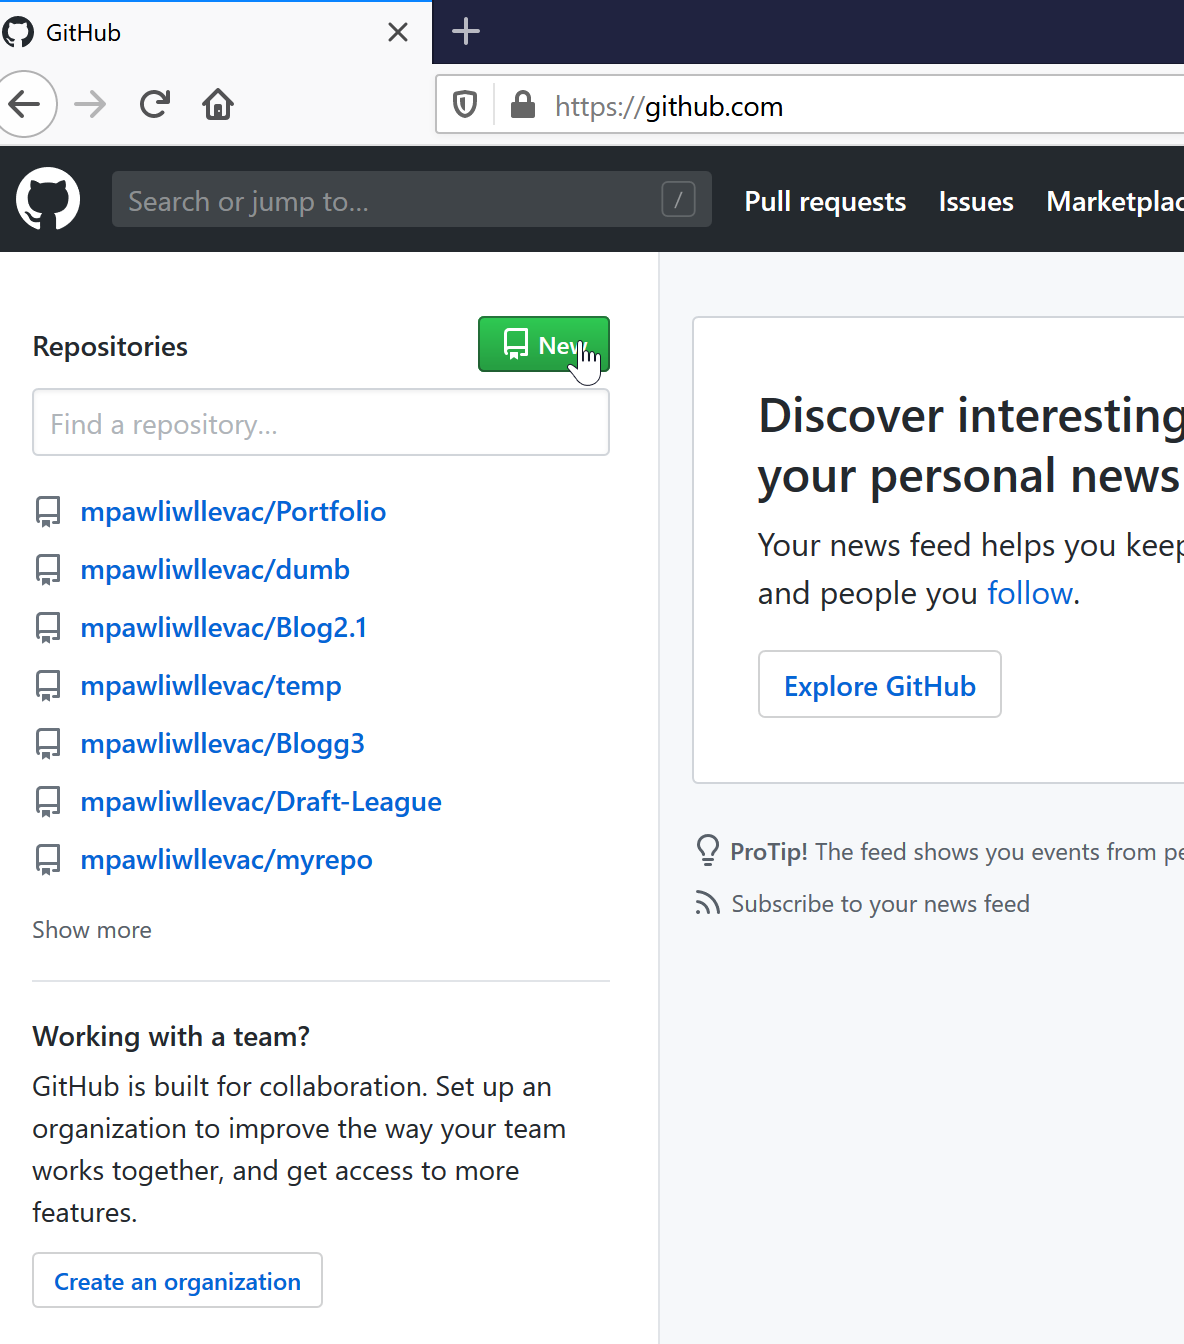 2of3
2of3 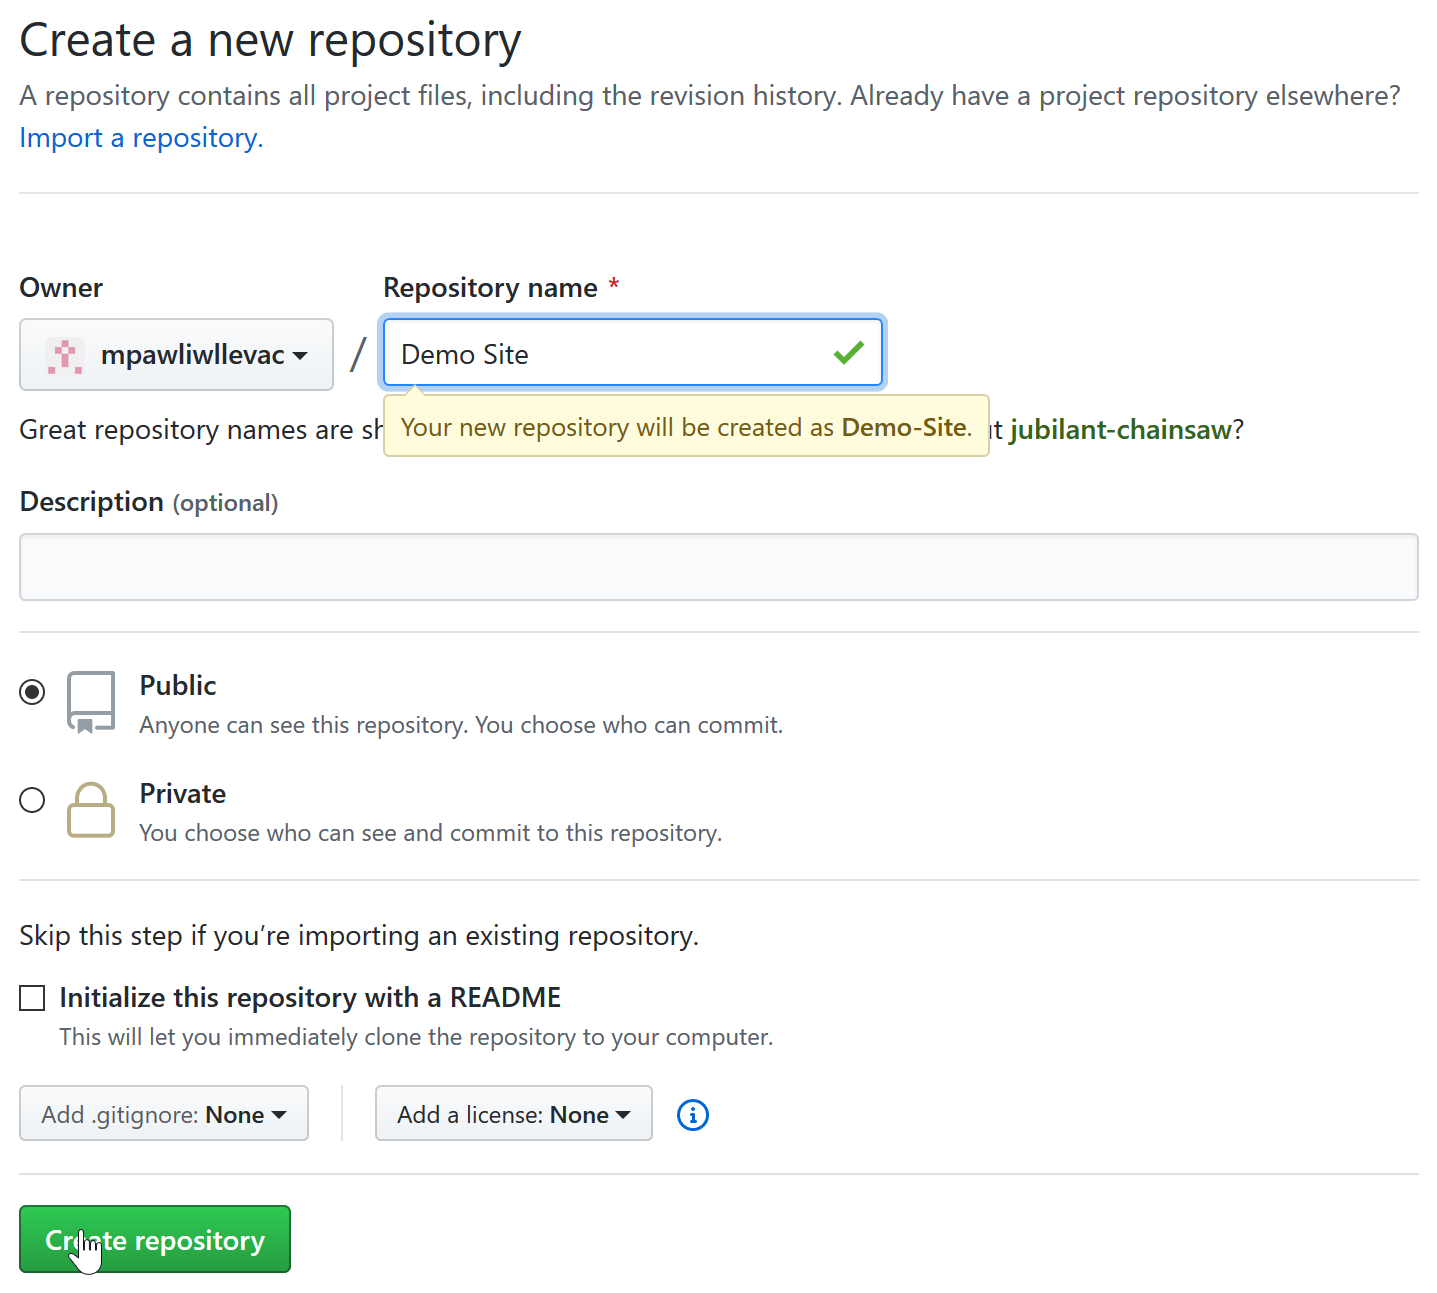 3of3
3of3 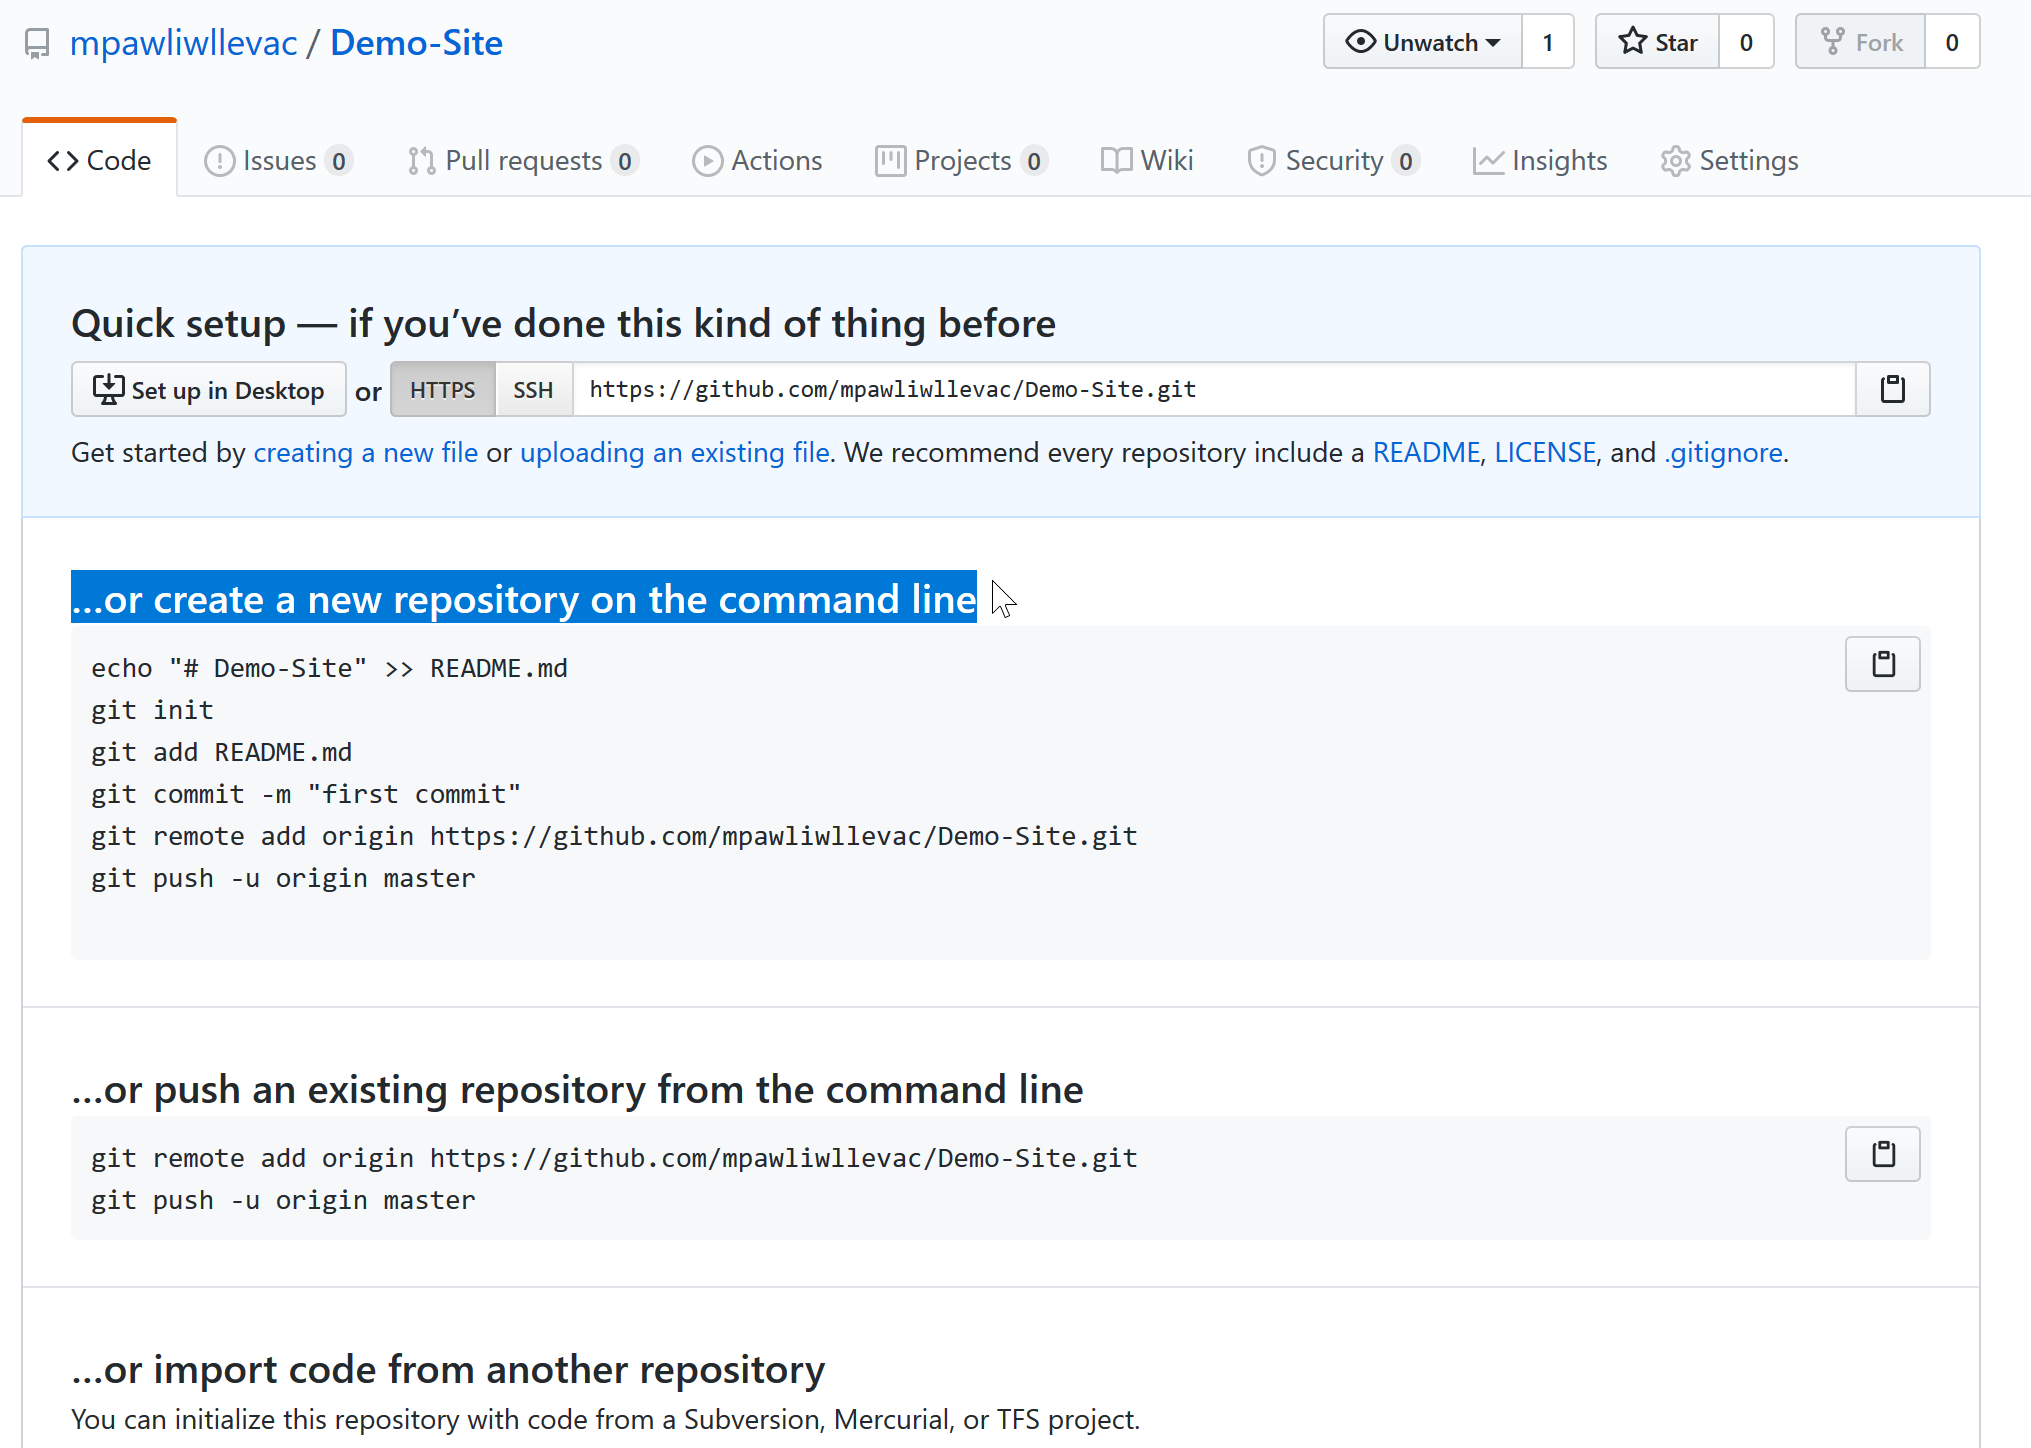
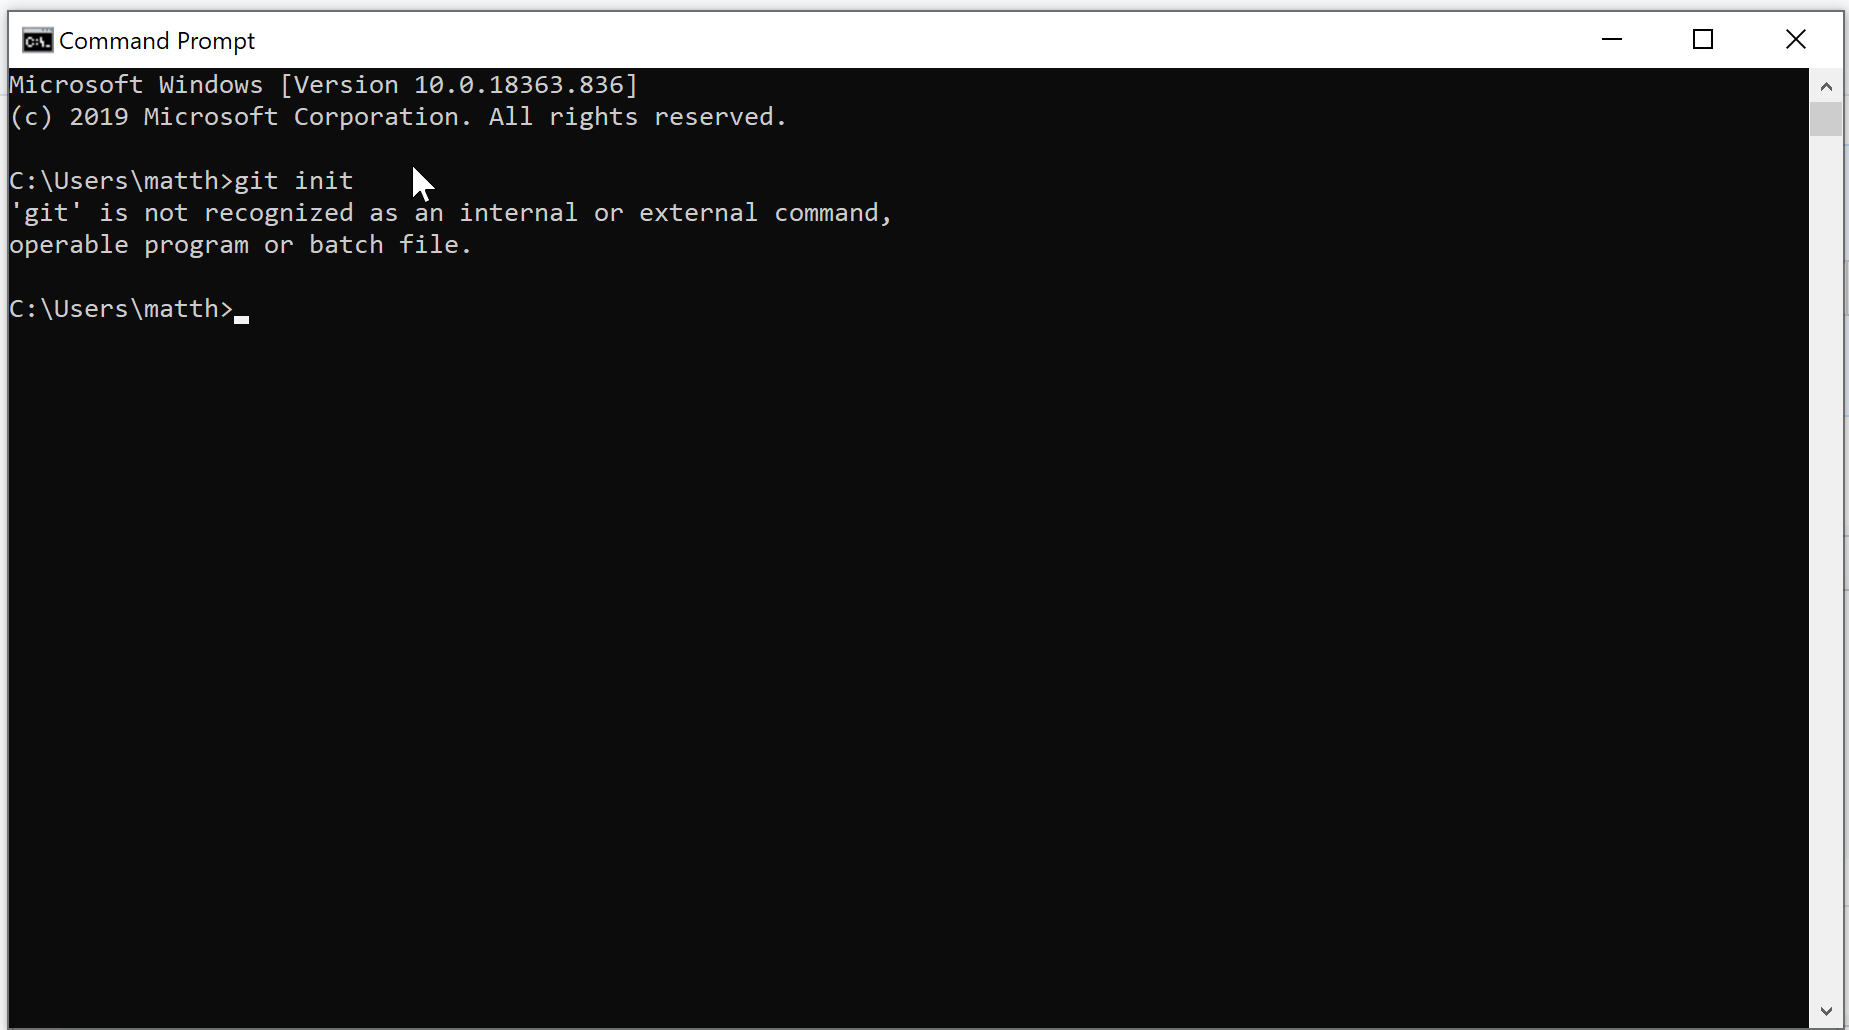
Using this code will require us to be on the command line though. You can get there from the start menu and typing ‘cmd’ into the search bar (unsure of directions on non-windows). This is where I ran into my first real problem in that the code shown on github wouldn’t run. If you, like me are getting an error along the lines of “git command does not exist” then your computer does not have git installed (easy test is typing “git init” into the command line). That’s ok though, we can fix it! The steps to getting this working are: 1) download and install git; 2) add git to the computers PATH variables.
Installing Git
So our next step is to install git, there’s nothing special about the installation and it can just be clicked through. You can download Git from this link https://git-scm.com/downloads . There are many options during the installation process and no changes from the defaults are necessary (unless your computer needs them for some reason).

Adding git to the computers PATH variables
Next, we’ll be adding git to the computers PATH variables. I won’t be going over that in detail here as it would just be a copy/paste of this guide ( https://git-scm.com/downloads ) but for my own records the button order is:
- control panel
- system
- advanced system settings
- advanced tab
- environment variables
- path -> edit
- new -> “;” and paste the path to the Git CMD file (eg ;C:Files-bash.exe ). Shft+R click will have a “copy as path” option though you’ll have to remove “”
- If you had the cmd window open already, close it then open it again.
- Done!
Upload your site to github, for real this time
Here’s the general code for using the git commands to upload your site. Of note is that after you attempt your first commit you will be asked for your github username and email (these can be provided with the commands git config – global user.email “you@example.com”, replacing email with user for the other). Additionally, the code provided below has 1 difference to the quick set up code. That difference is git add . to add everything in our project folder to our commit, and is indicated by the comment with #####.
#rememeber that despite this showing up as R code its going on the command line
#these user specific paths would also be made for you if you have the code from
cd the_path_to_your_project_folder #eg C:\Users\matth\Dropbox\R Working Directory\Demo Site
echo "# [repositoryname]" >> README.md #eg # Demo-Site
git init
git add README.md #this will add a readme file. you'll only need to add this once
git add .  #####the period indicates everything in the folder
git commit -m "first commit" #the quotes can be anything and are what you're calling this particular commit. its useful to keep it organized
git remote add origin {url for the repository} #eg https://github.com/username/Demo-Site.git
git push -u origin master
1of9 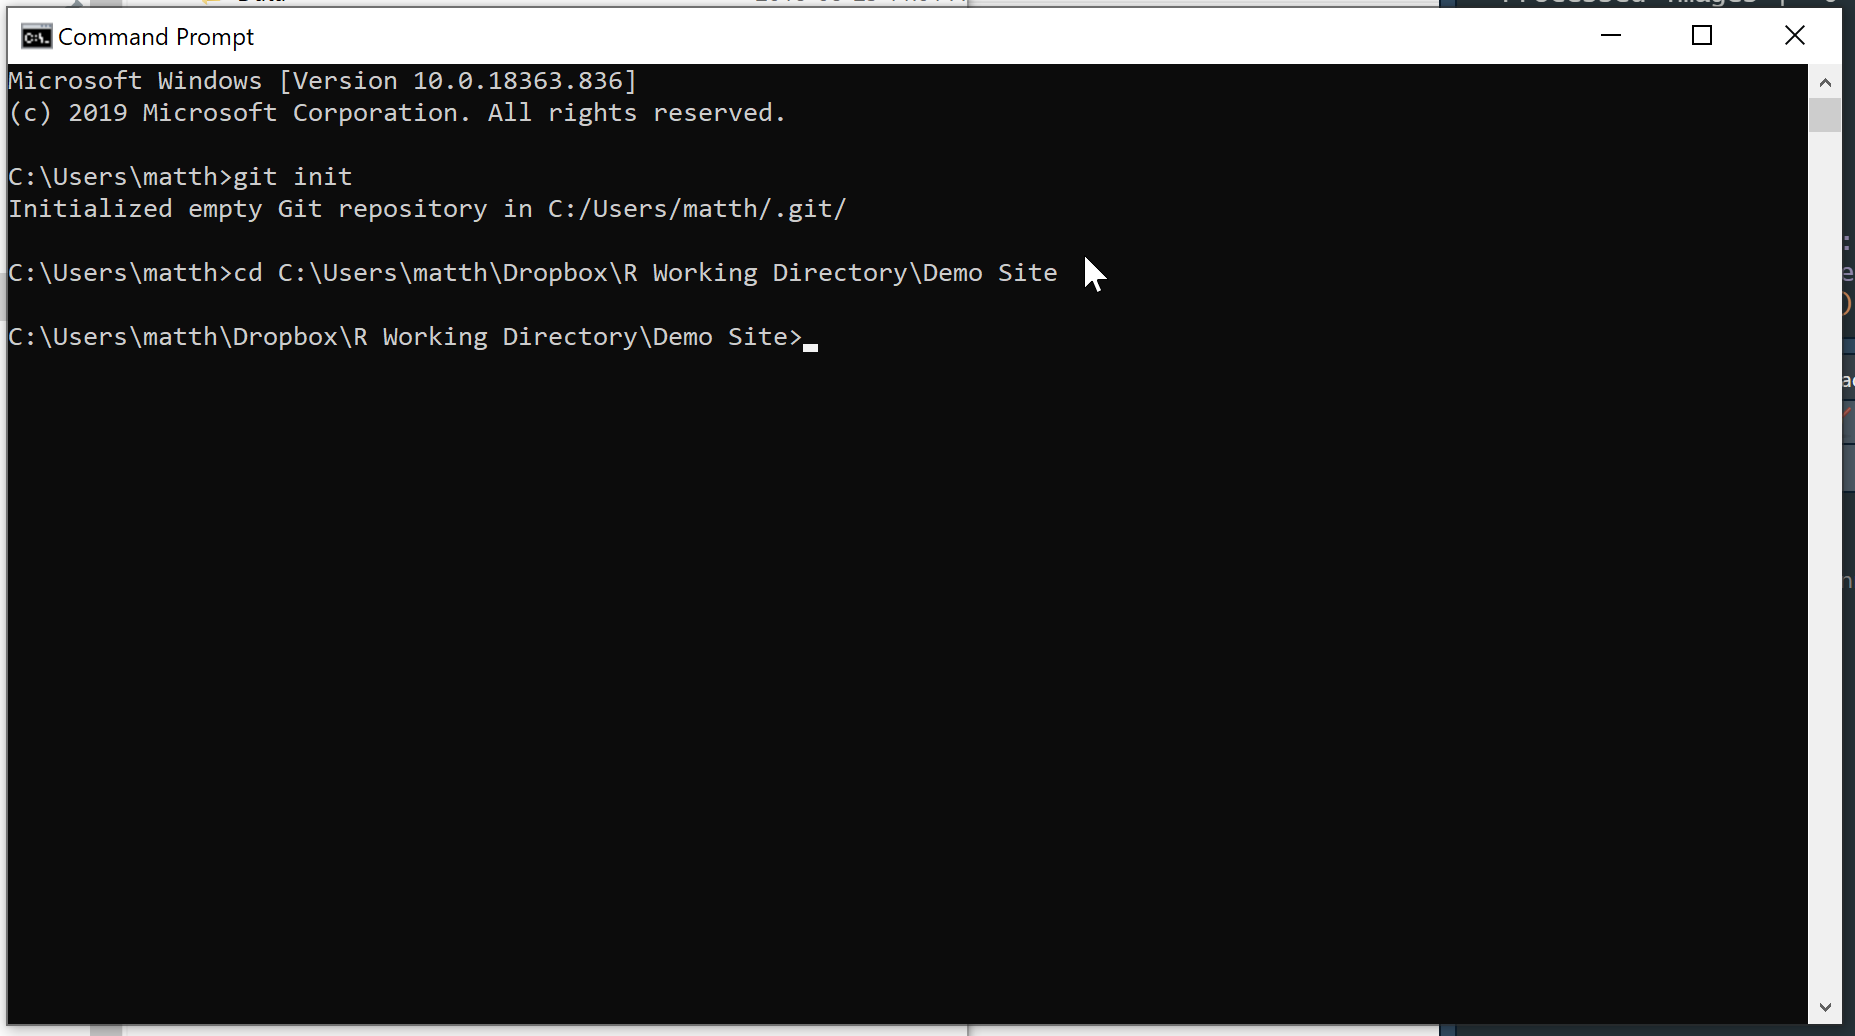
2of9 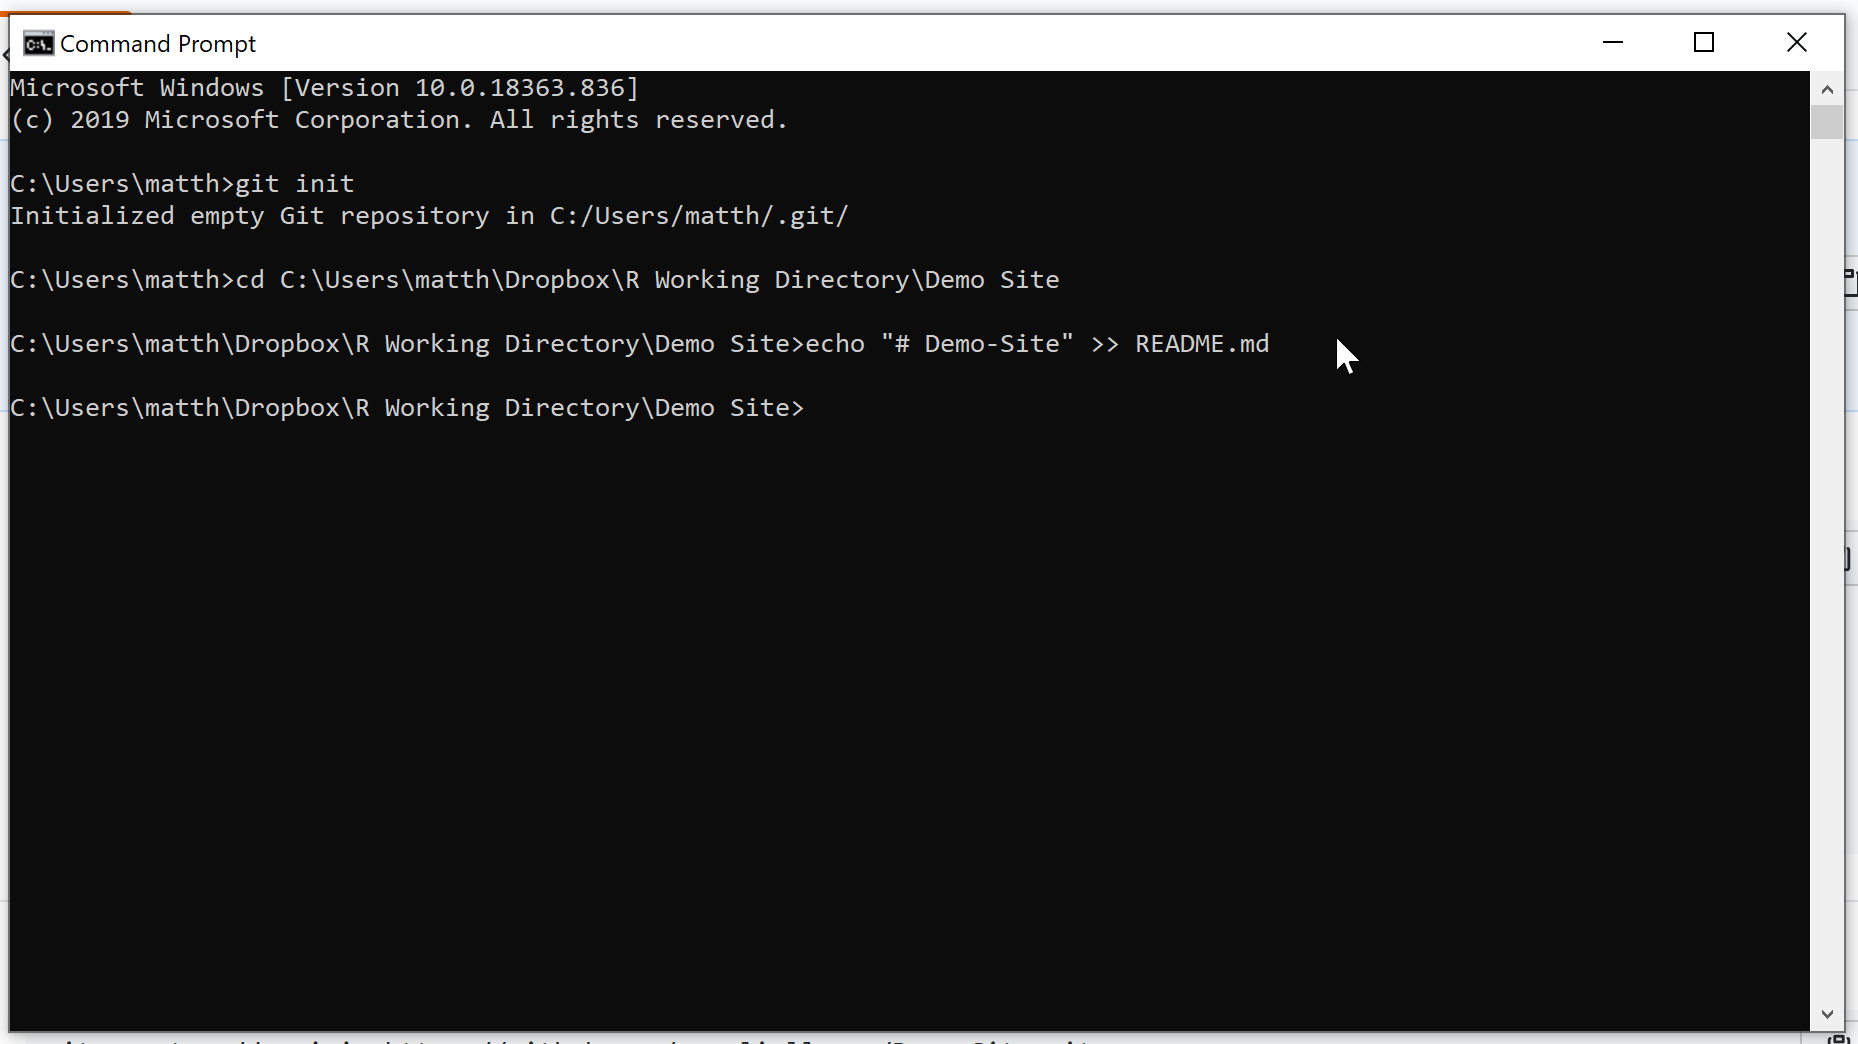
3of9 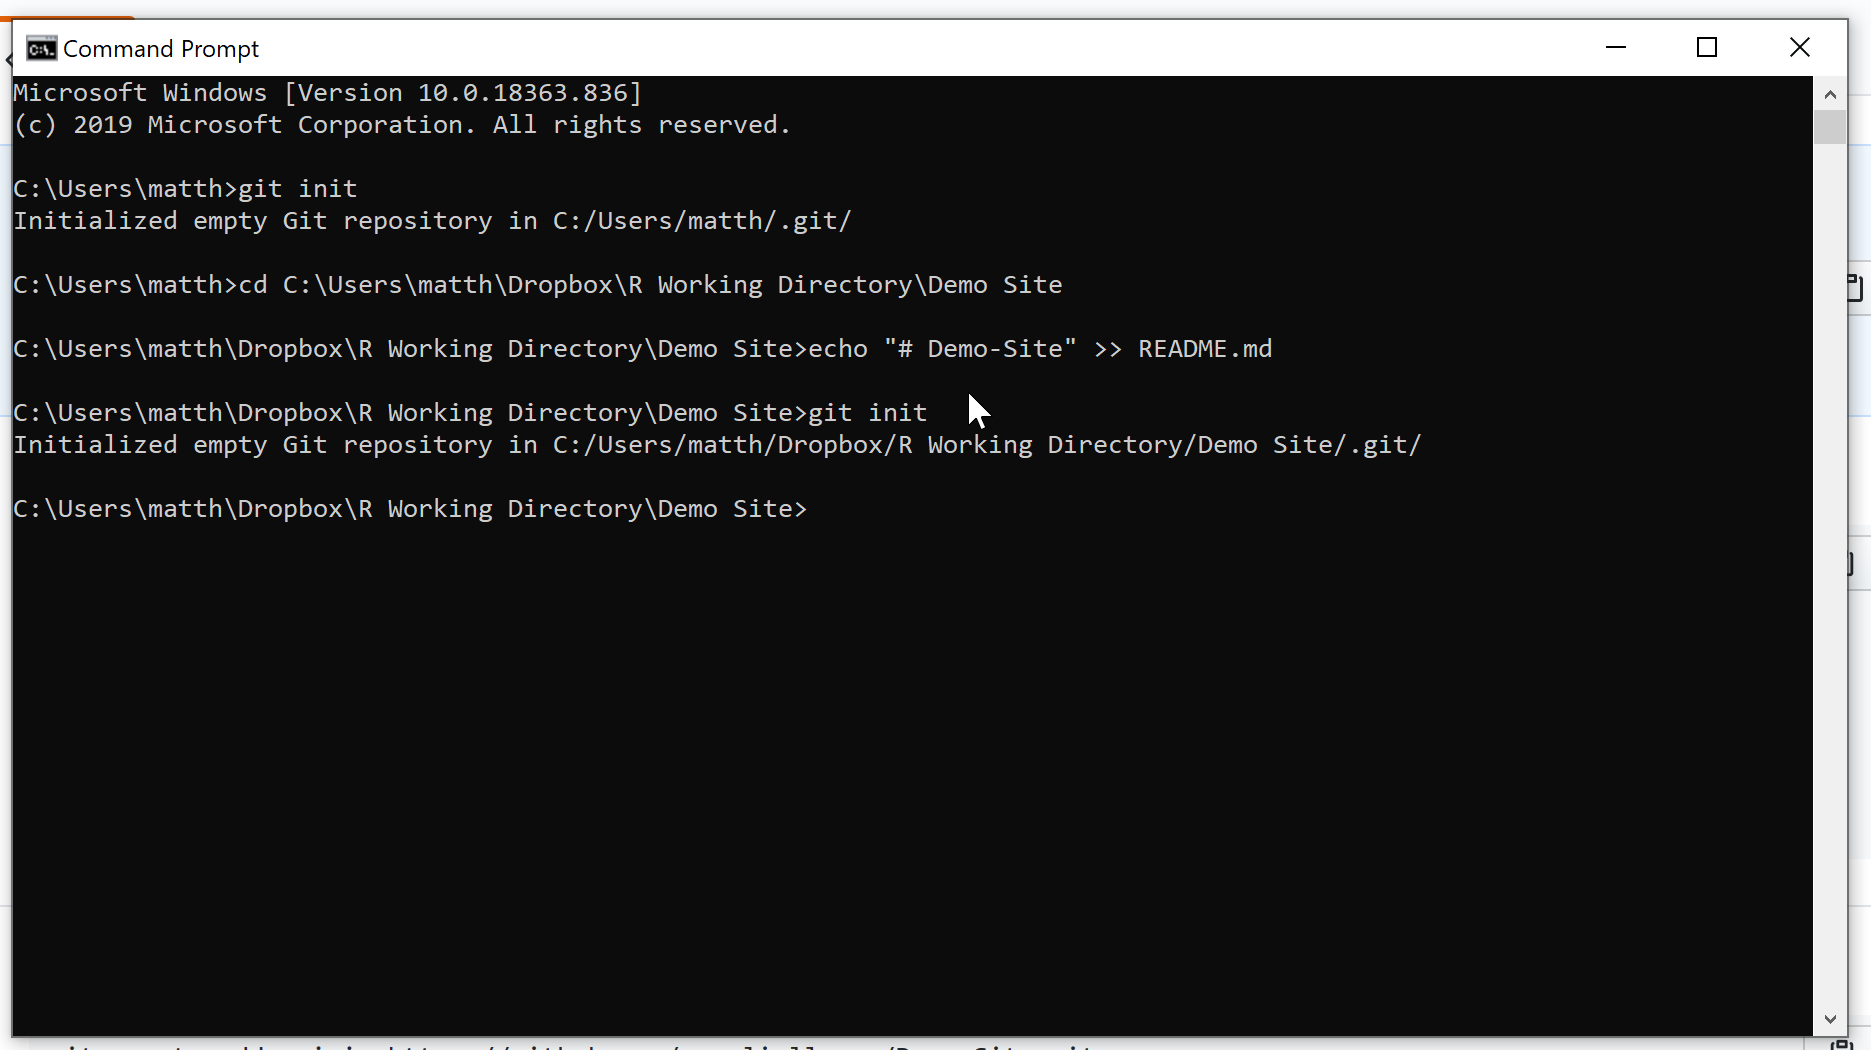
4of9 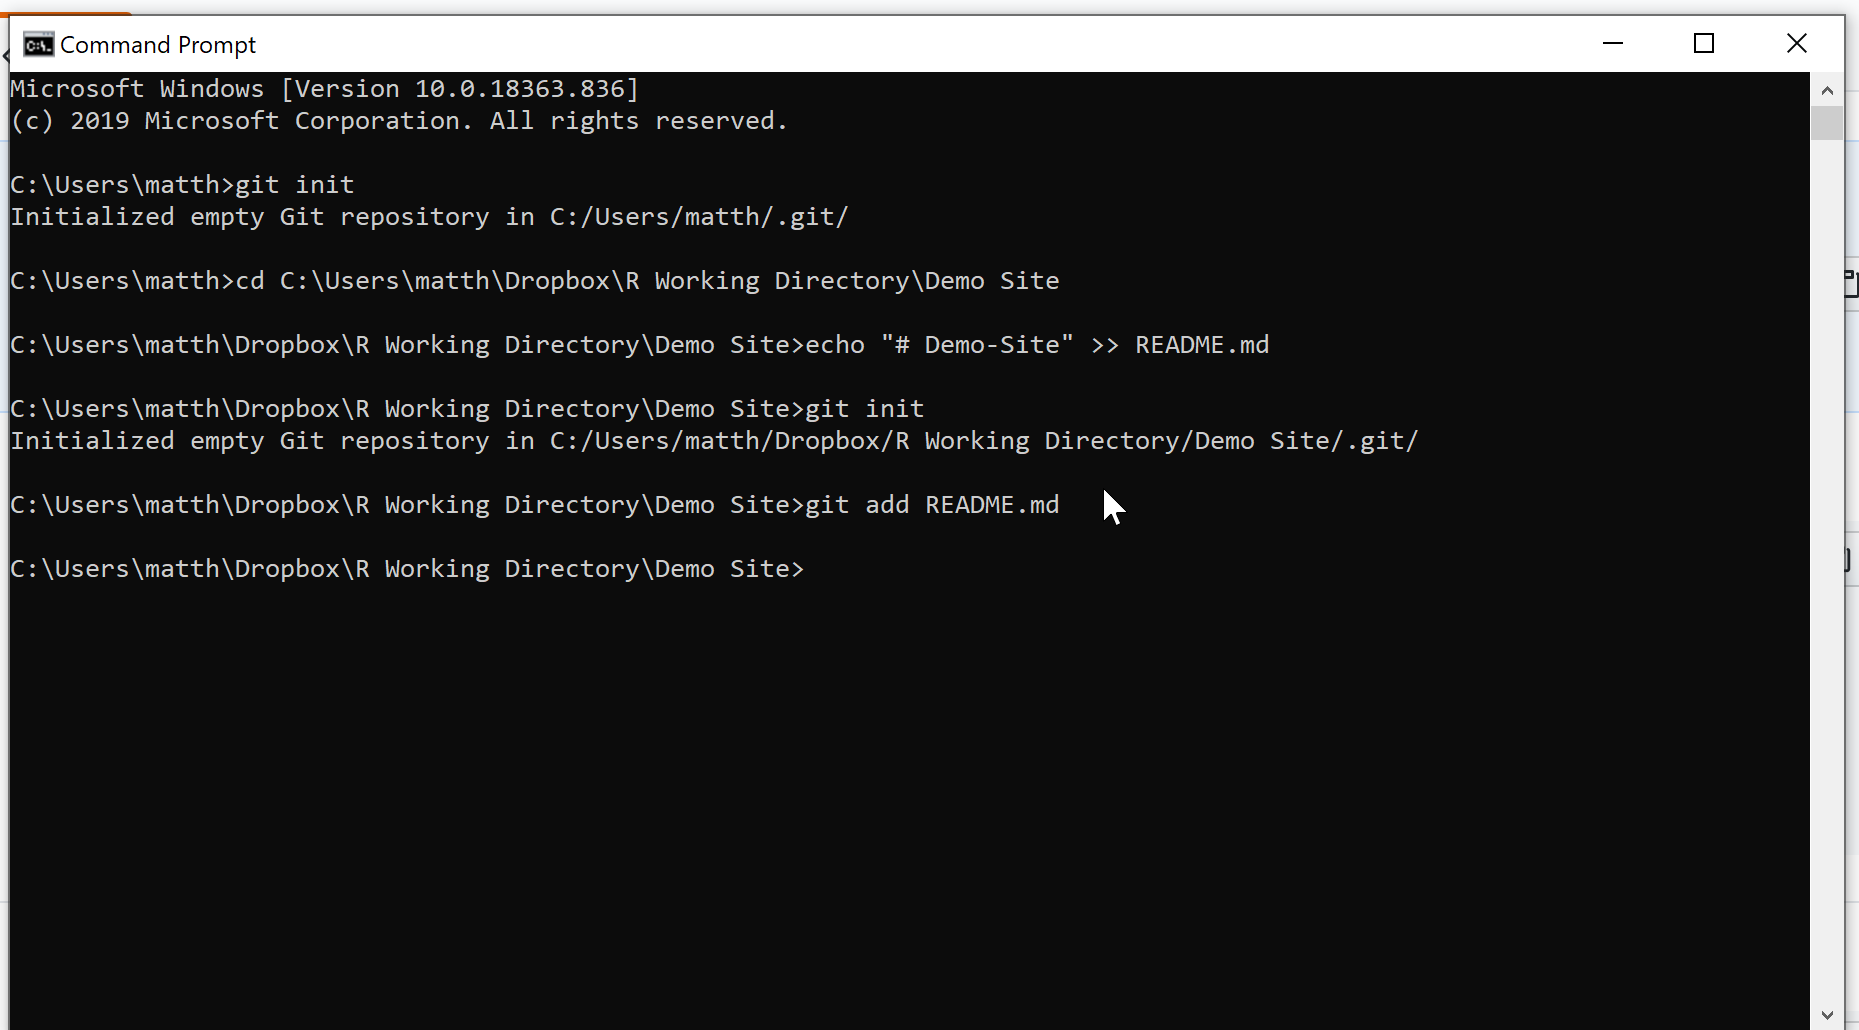
5of9 
6of9 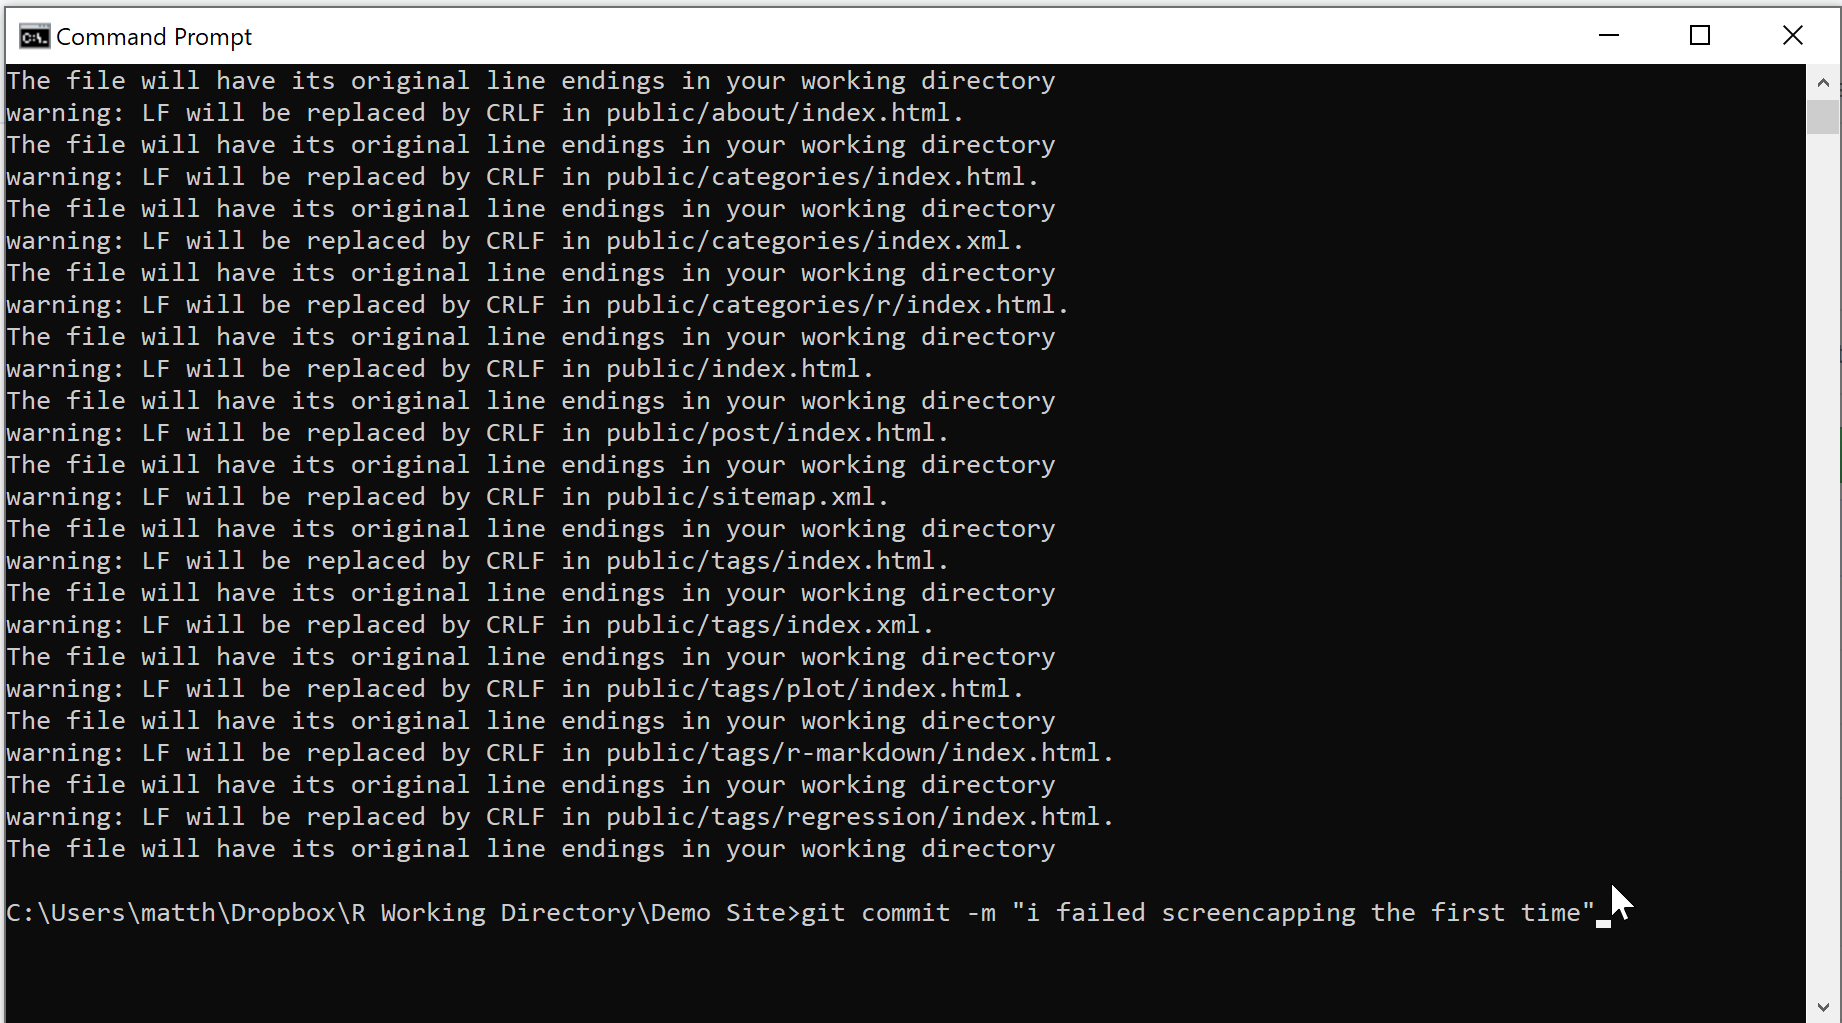
7of9 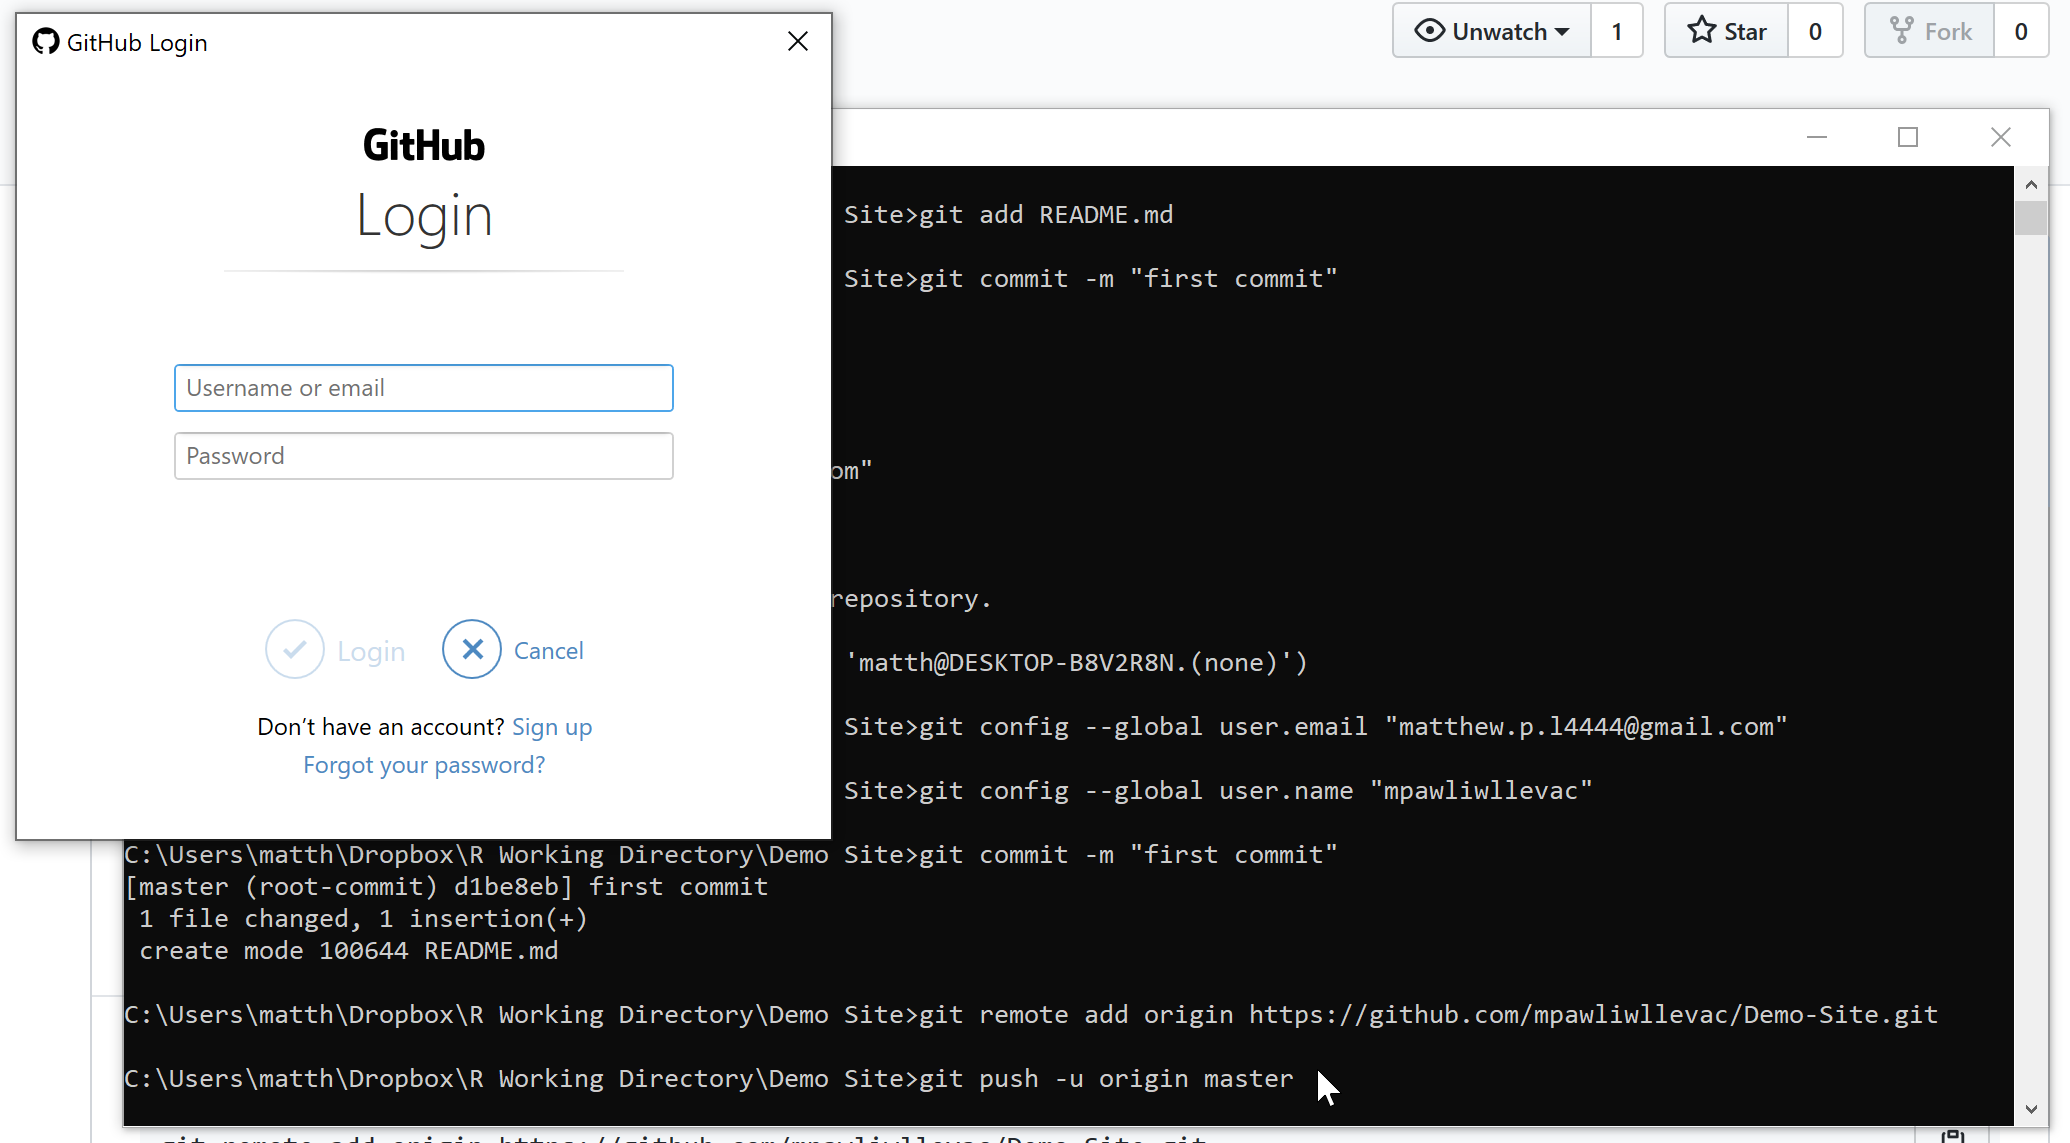
8of9 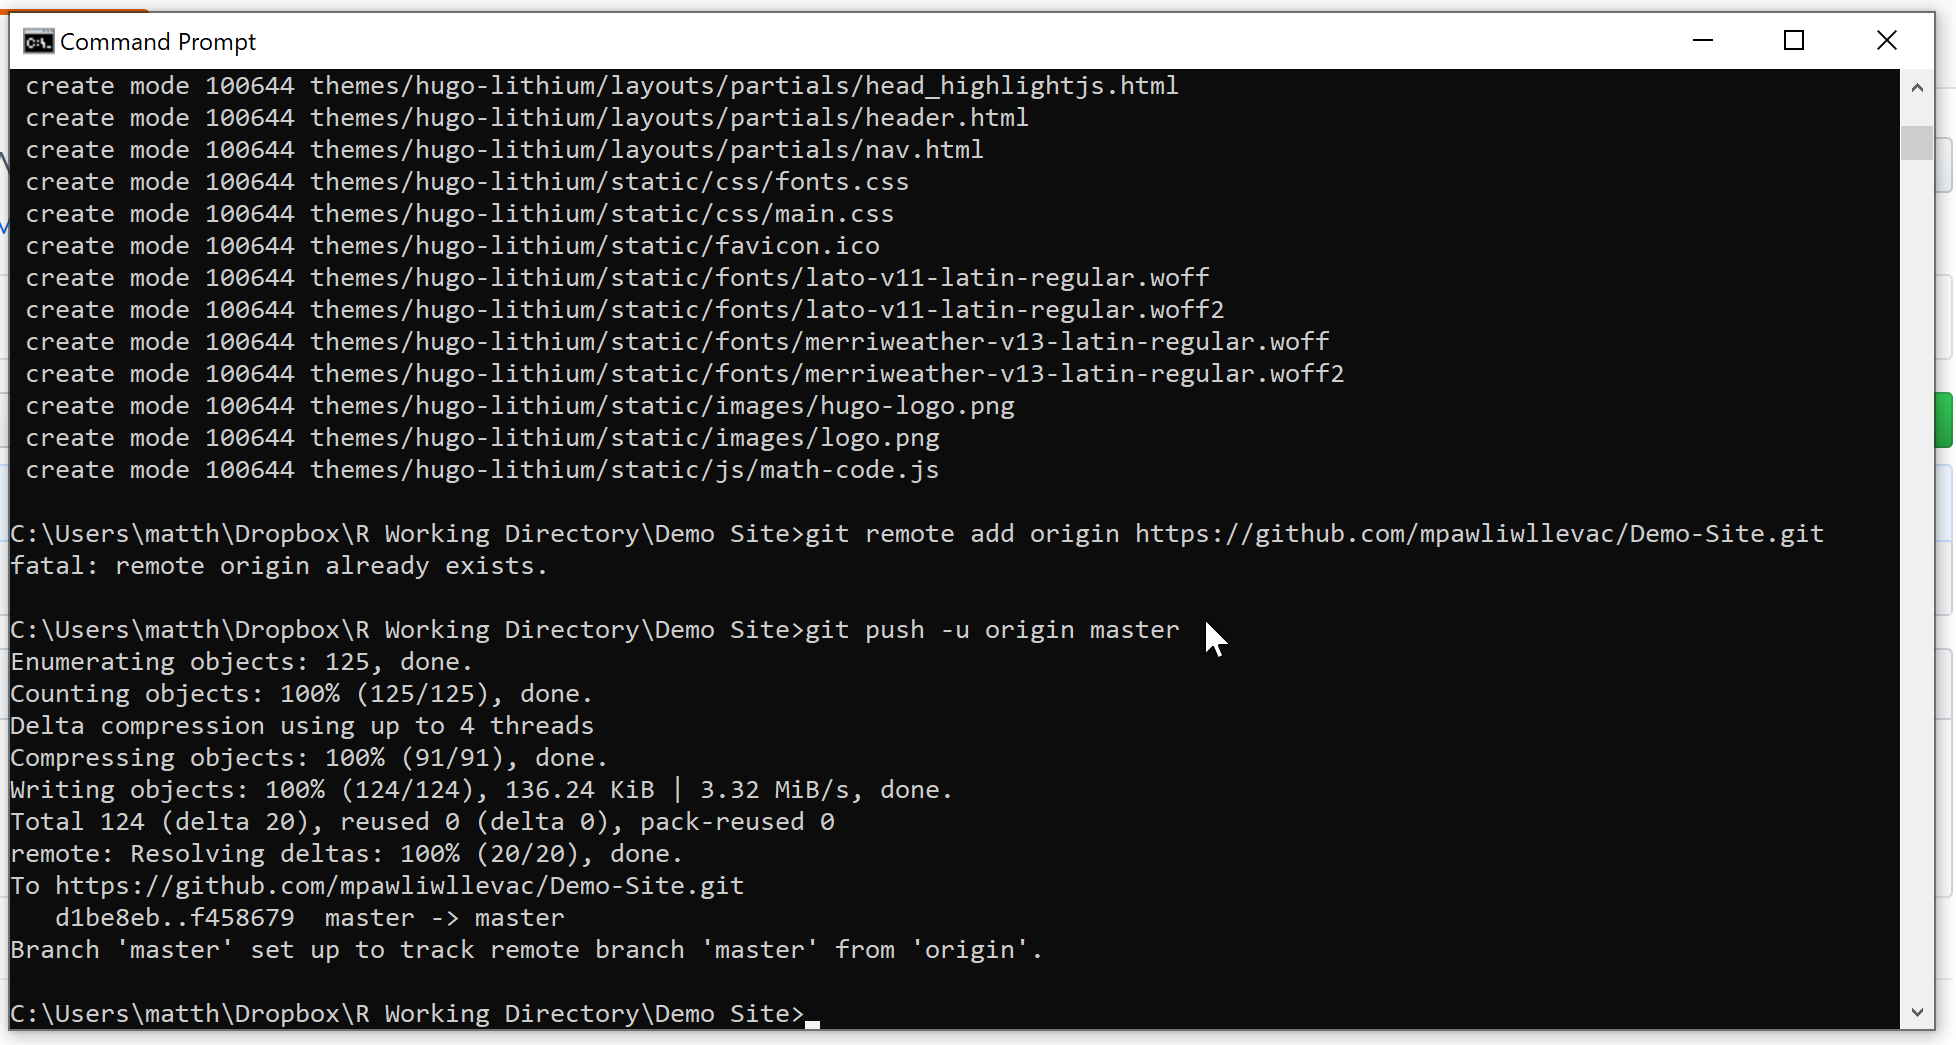
9of9 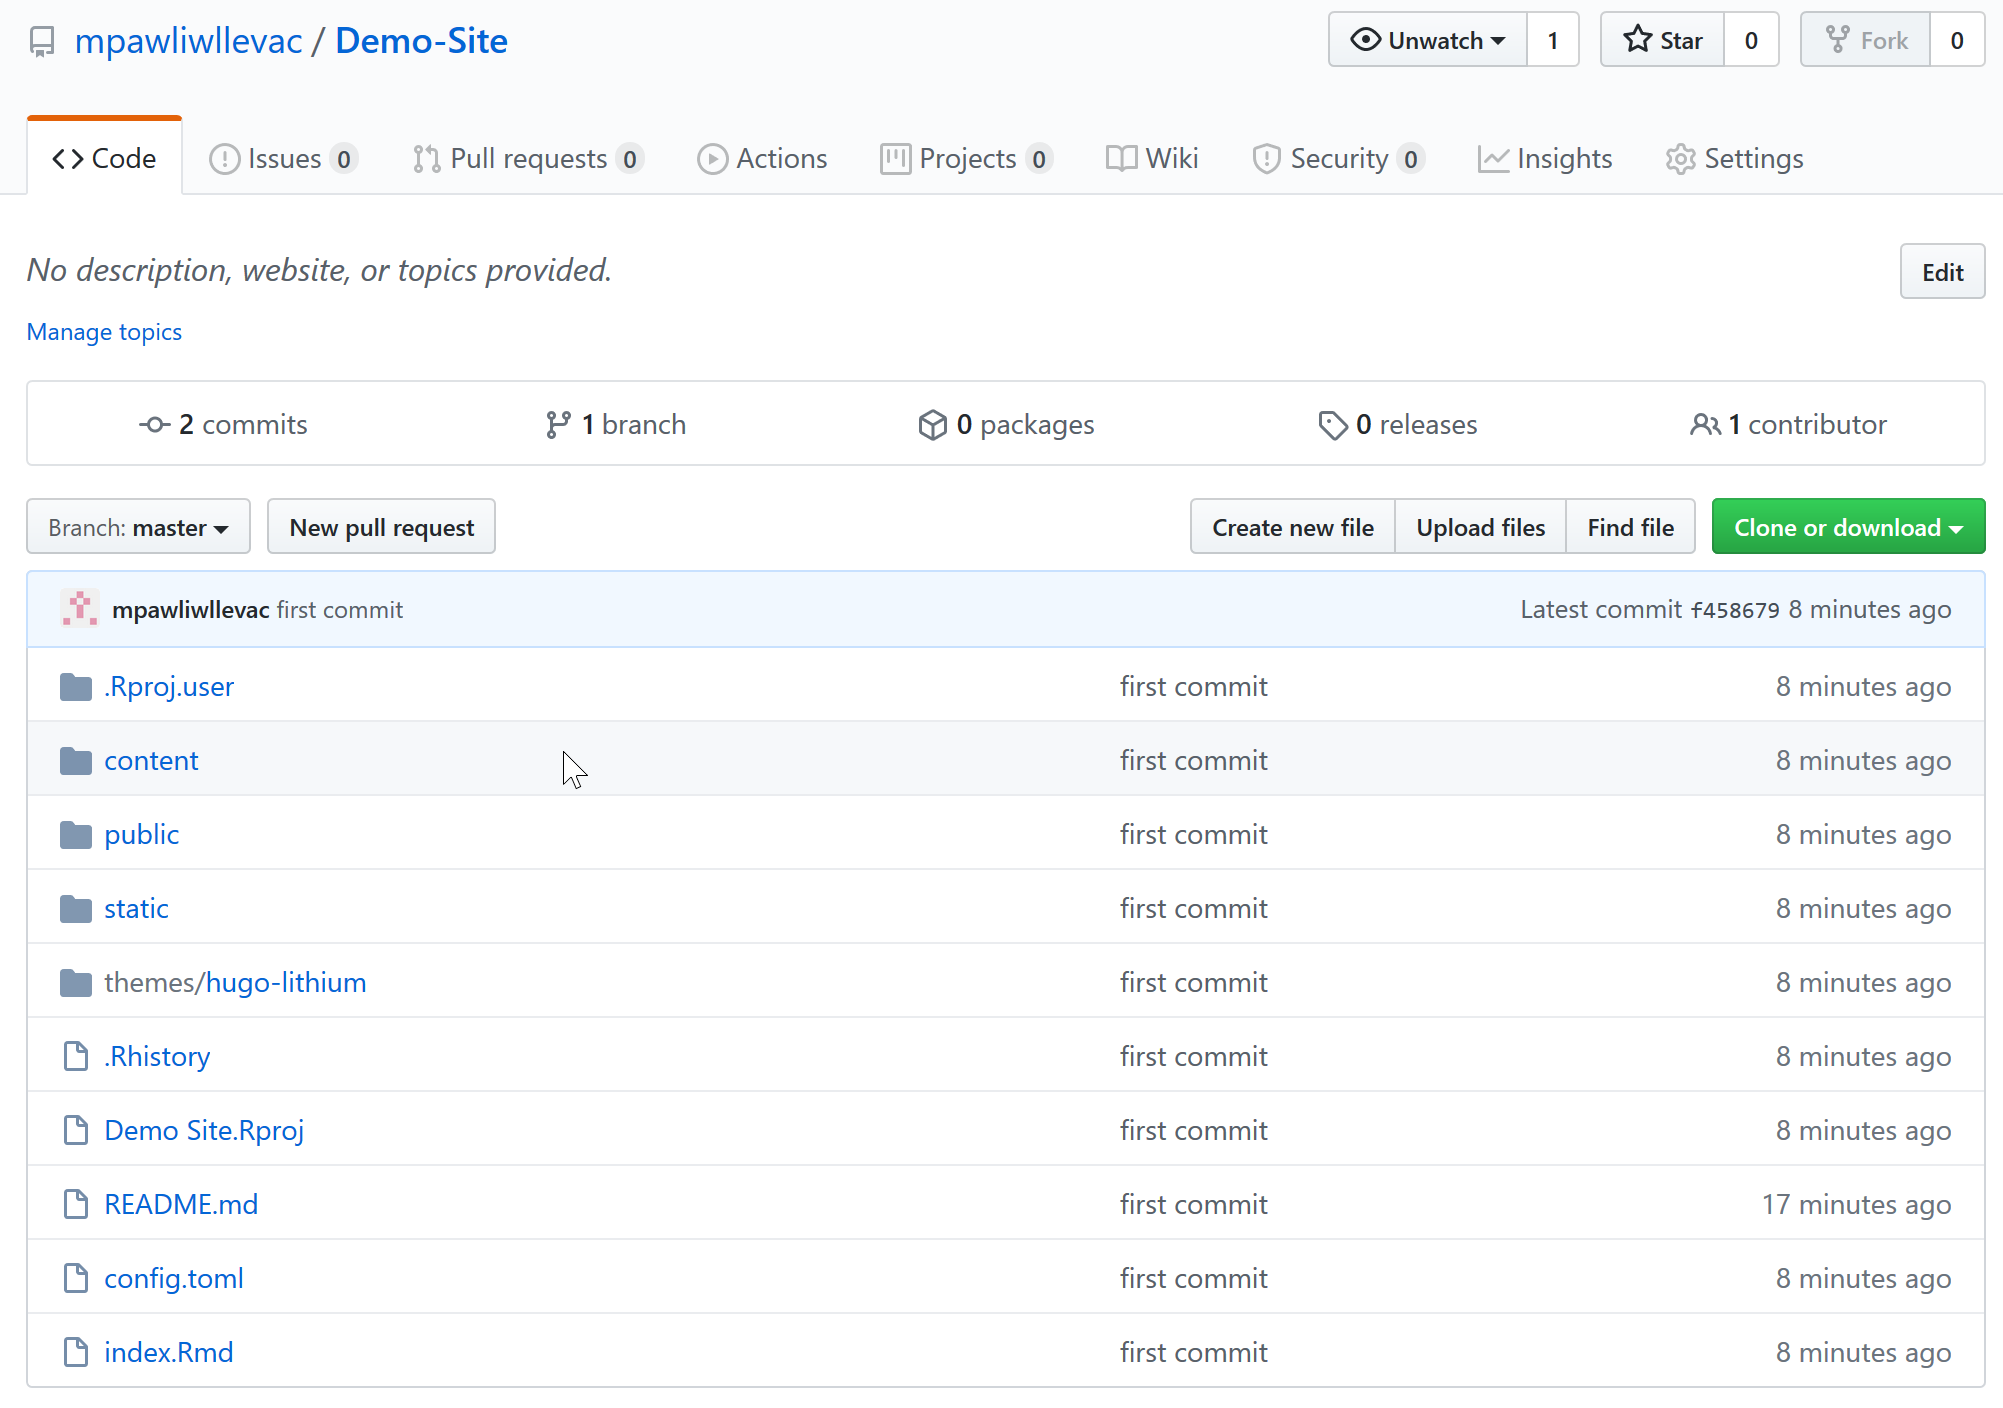
Once you’ve pushed to the master branch you can refresh the webpage with the repository and the files should all be there. This means that you’ve successfully uploaded your website to github. This was a hardest step. All that’s left is Netlify so that the whole world can see what you’ve made!
Have Netlify
For this step you’ll be going to www.netlify.com and making an account with them. This is how we’ll be deploying our website.

Build Netlify Site Deploying From Github
We’re in the home stretch. This part is largely pushing buttons so here’s the list of buttons after you’ve got your account.
- Sites tab
- new site from git
- github as the git provider
- authorize netlify into your github
- select the repository you’ve made for your website (the one you were committing files to earlier)
- ‘show advanced’ build settings
- new variable
- Key: HUGO_VERSION
- Value: 0.53 (value depends on theme used)
1of7 
2of7 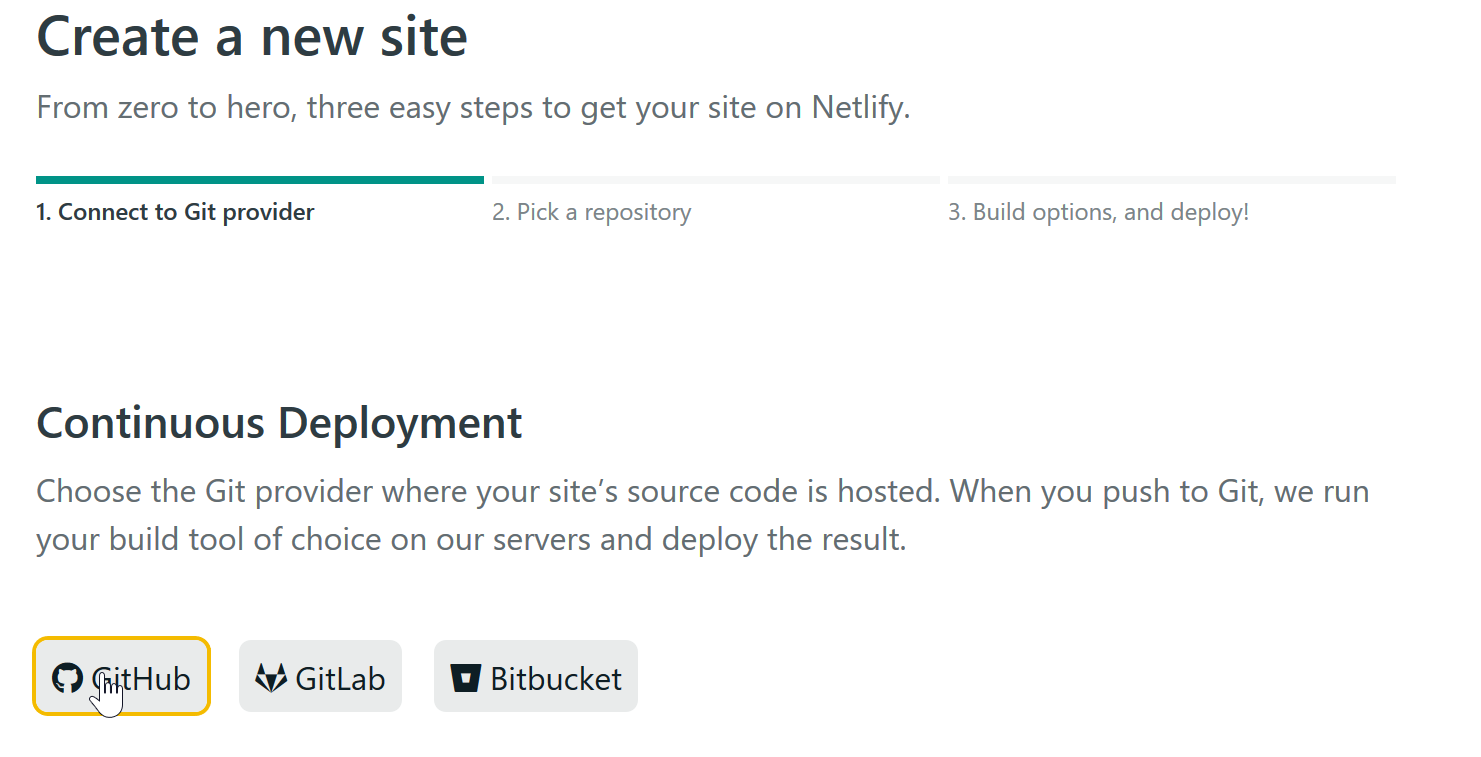
3of7 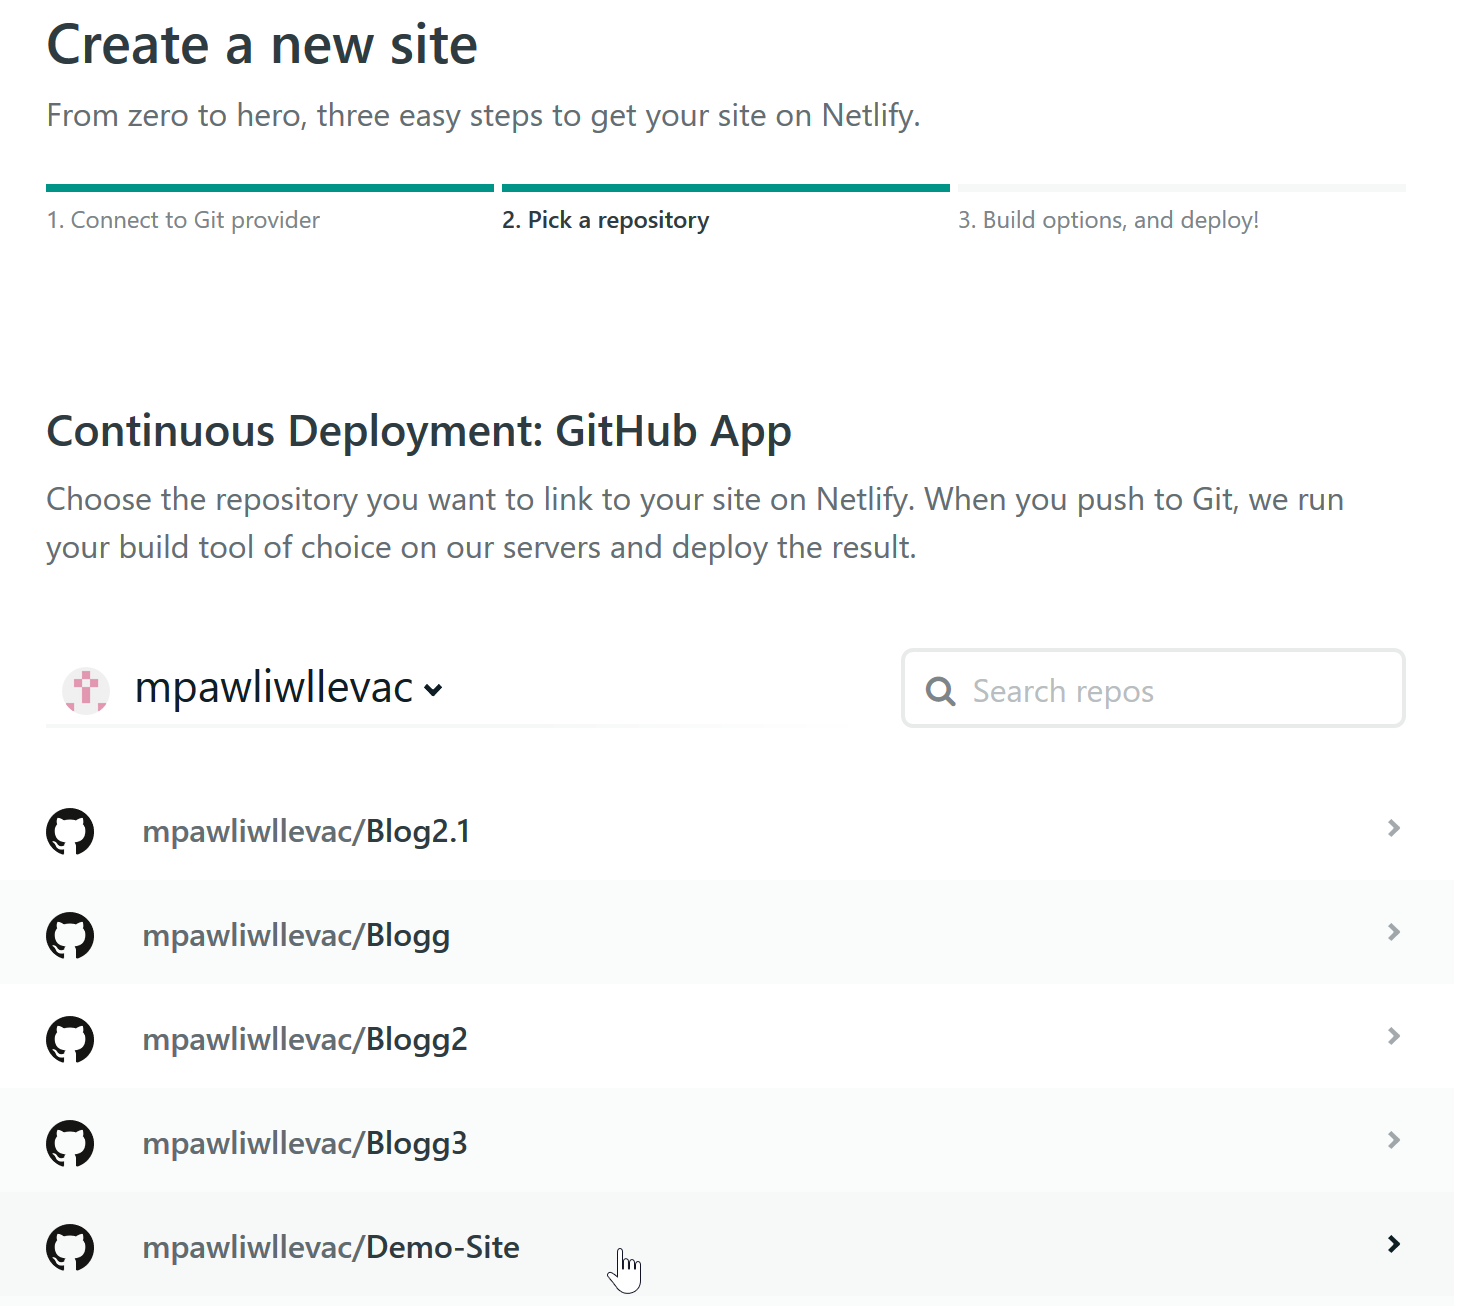
4of7 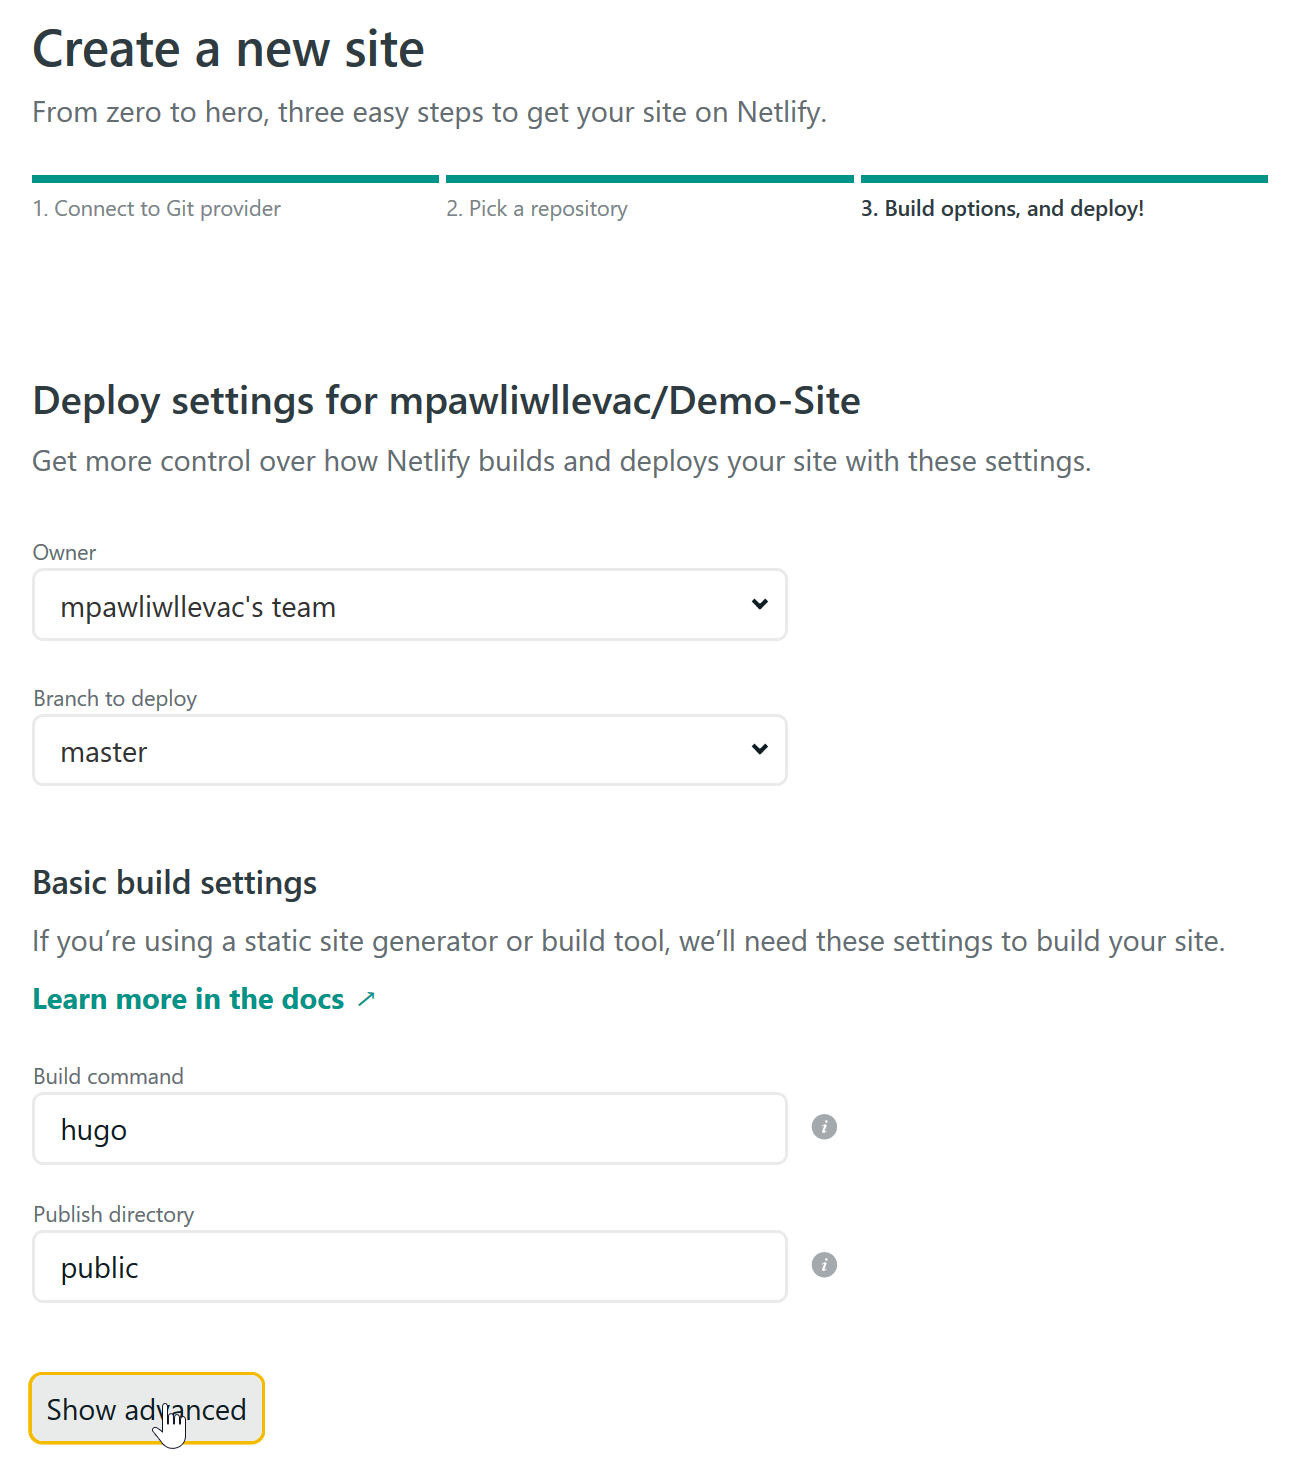
5of7 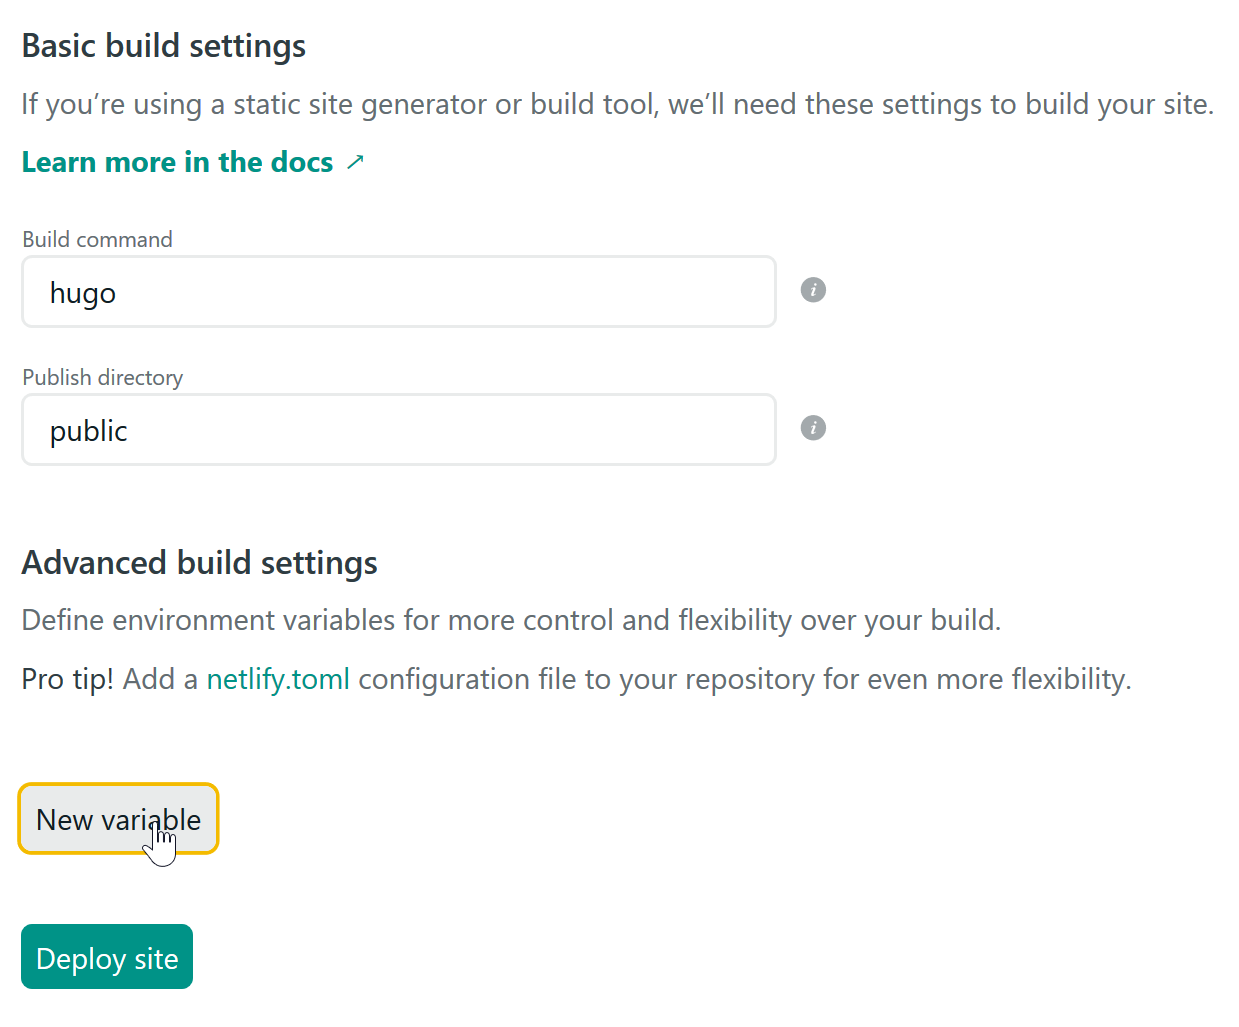
6of7 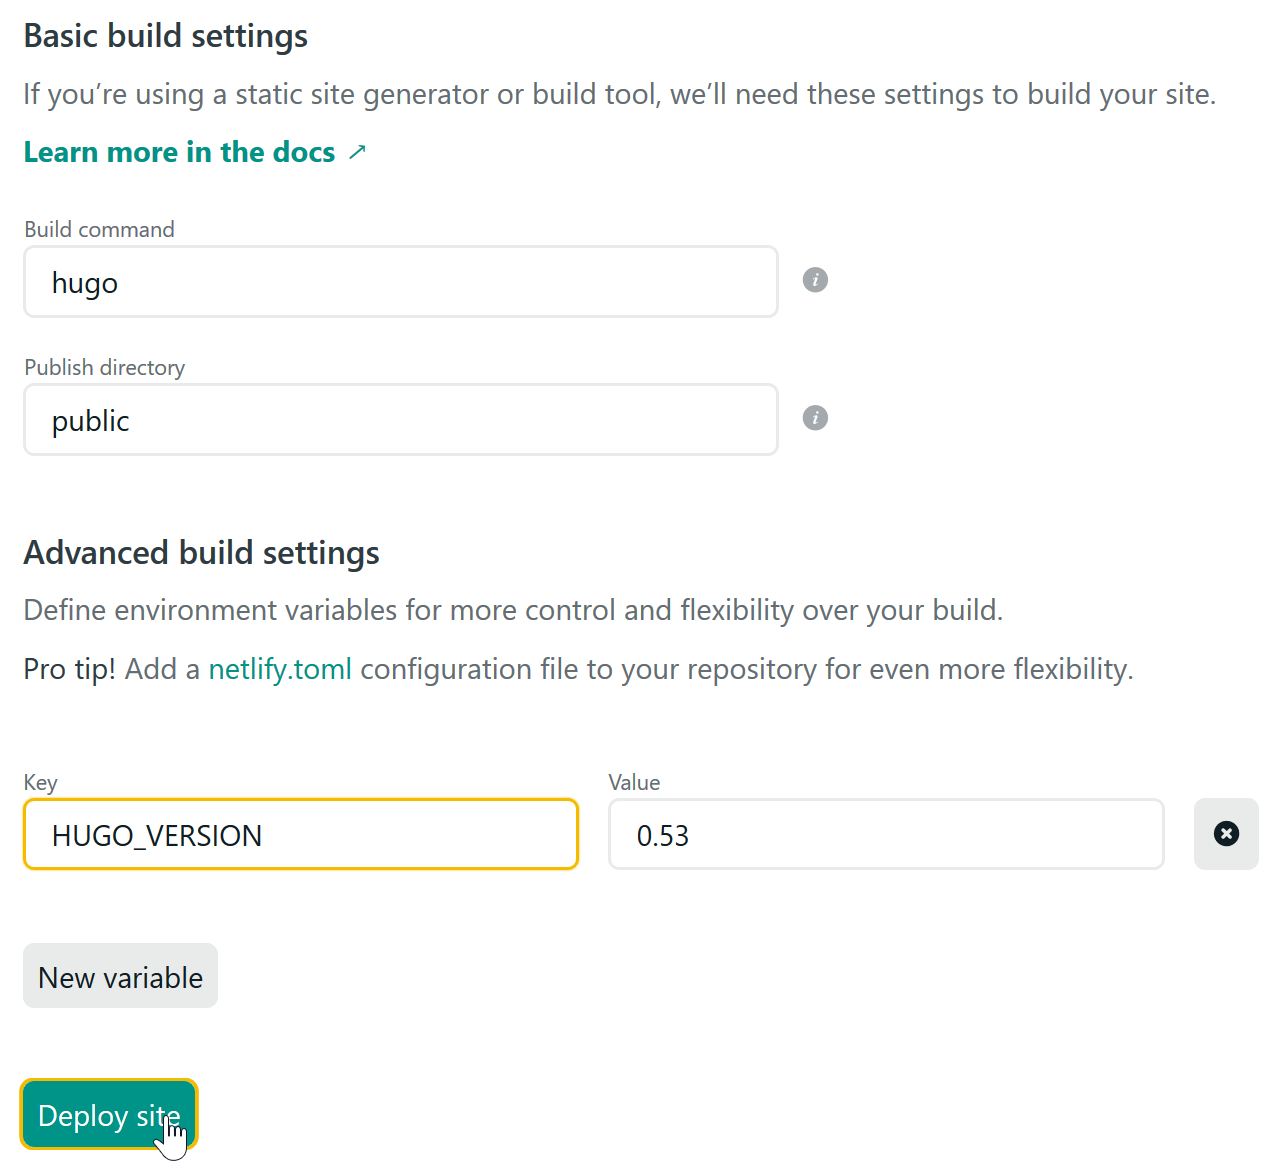
7of7 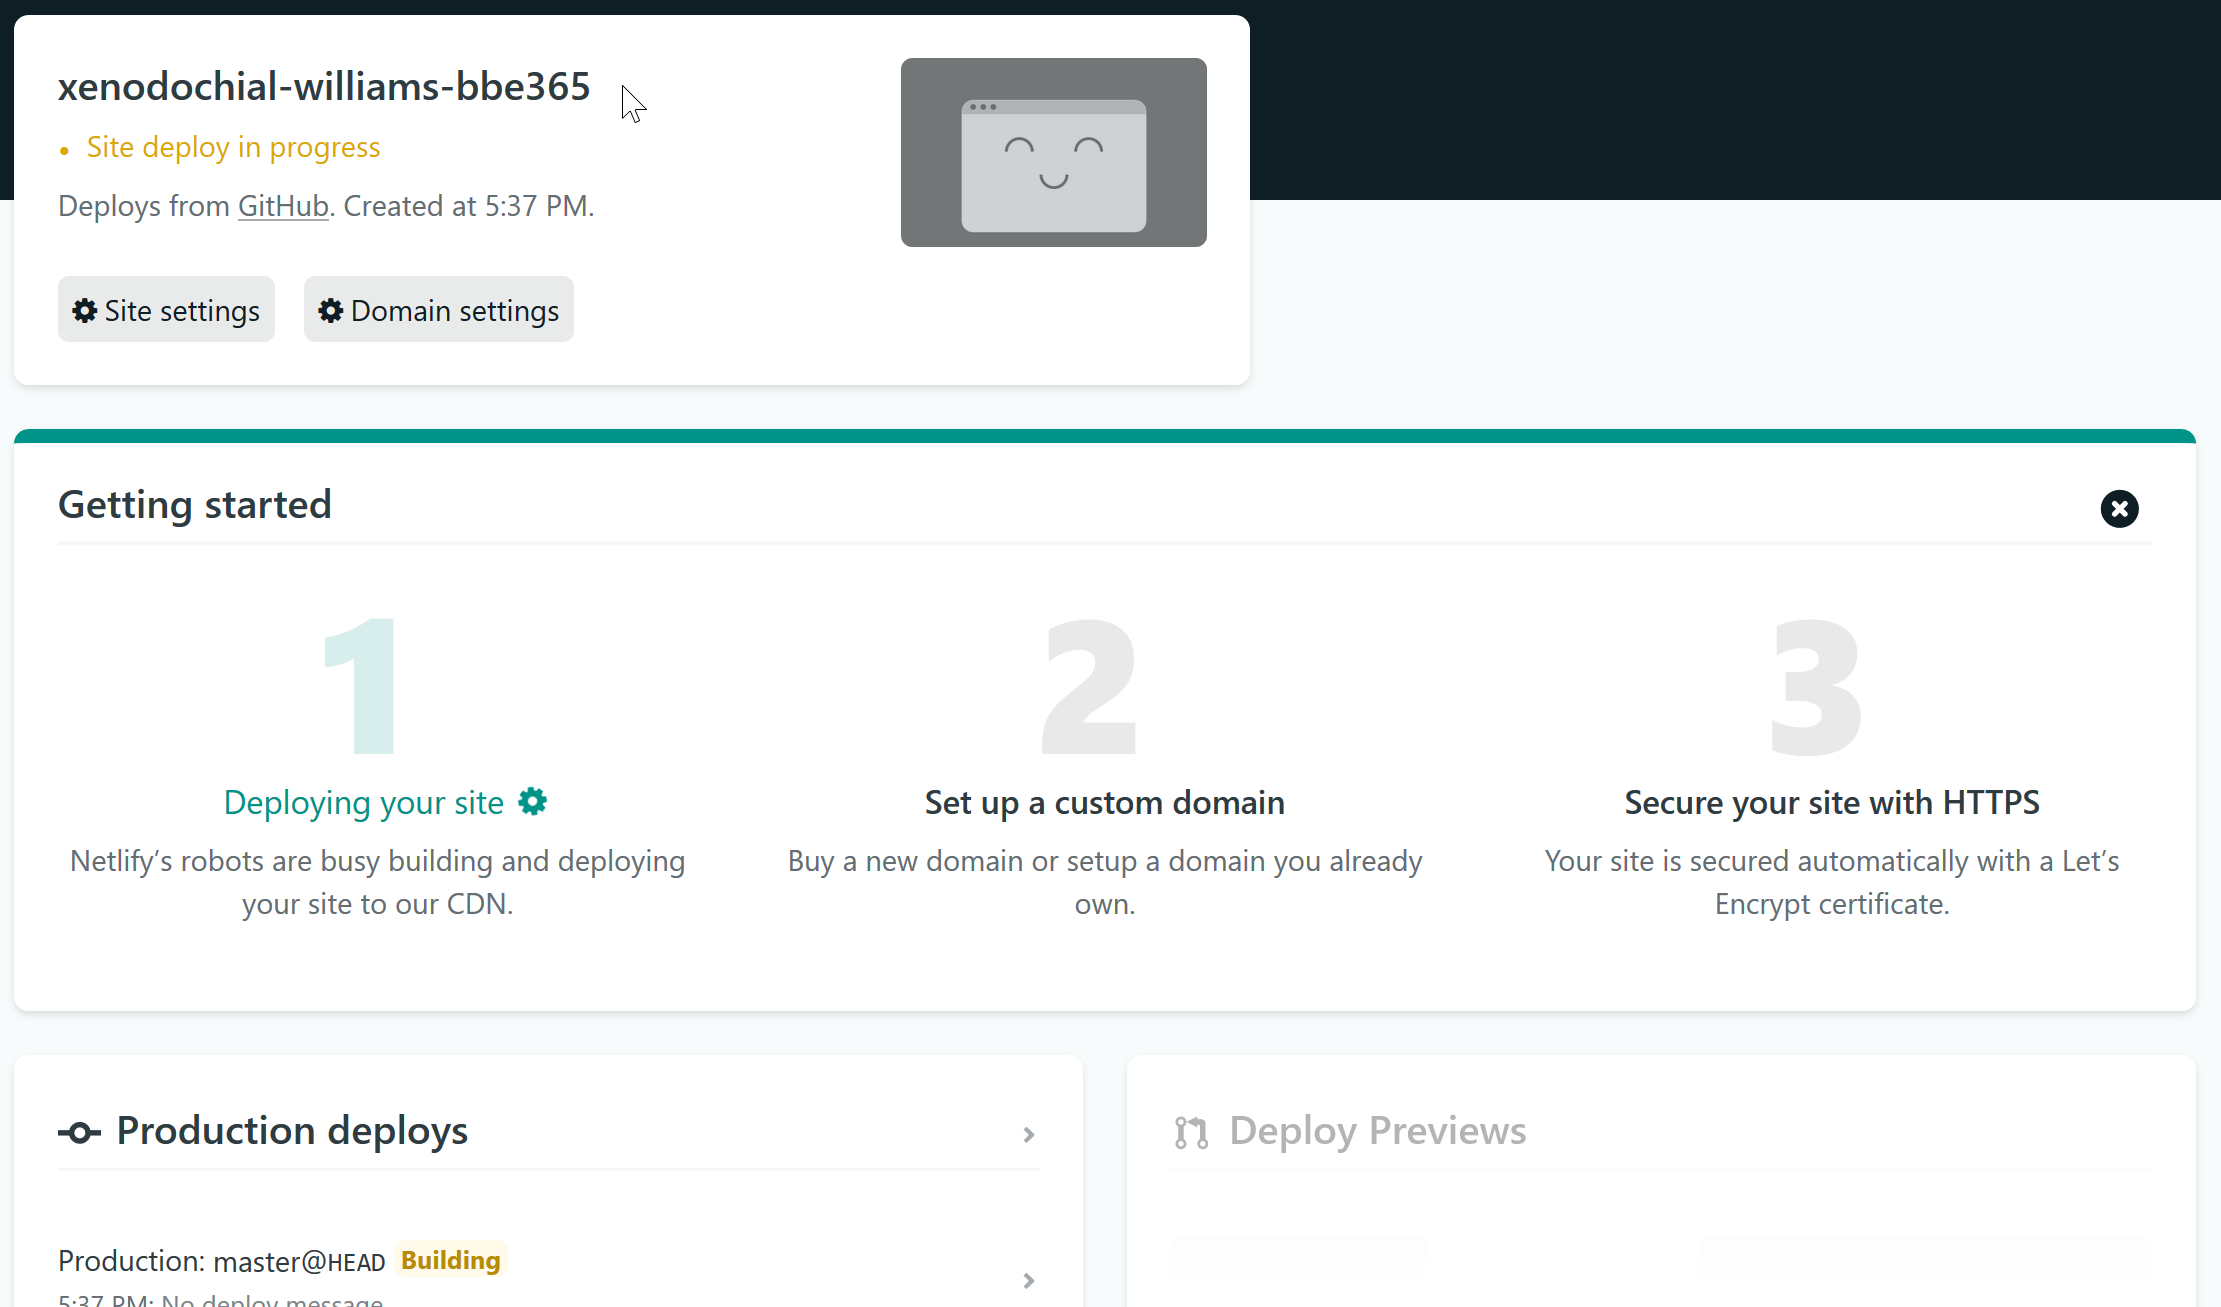
You’ll be taken to a new page saying that the deployment of your website is happening. This is it. Your site is being birthed onto the internet. Assuming the deploy works you’ll be able to click on the link for your site which will be something like https://nonsense-numbers.netlify.app and you’ll be able to see your website on the internet. Check from your phone, its really cool to be able to see the fruit of what you did.
Now if you don’t want random giberish as your website url you can fix it (without purchasing a custom domain). We got some more buttons:
- start on the overview tab of your brand new shiny website (this is also where netlify drops you after making the site)
- site settings
- Under site details, then under site information -> “change site name”
- Cange it to whatever you want. It’ll still end in ‘.netlify.app’ though
1of3 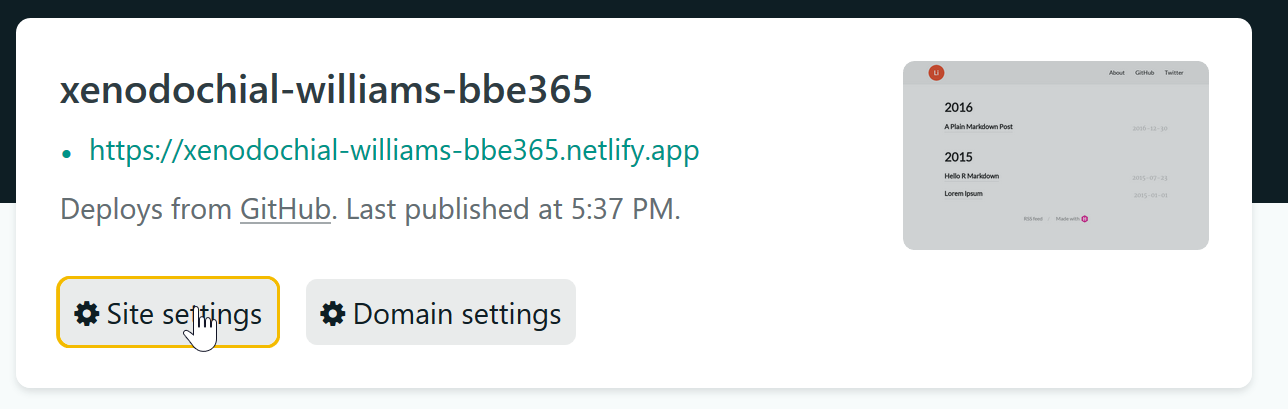
2of3 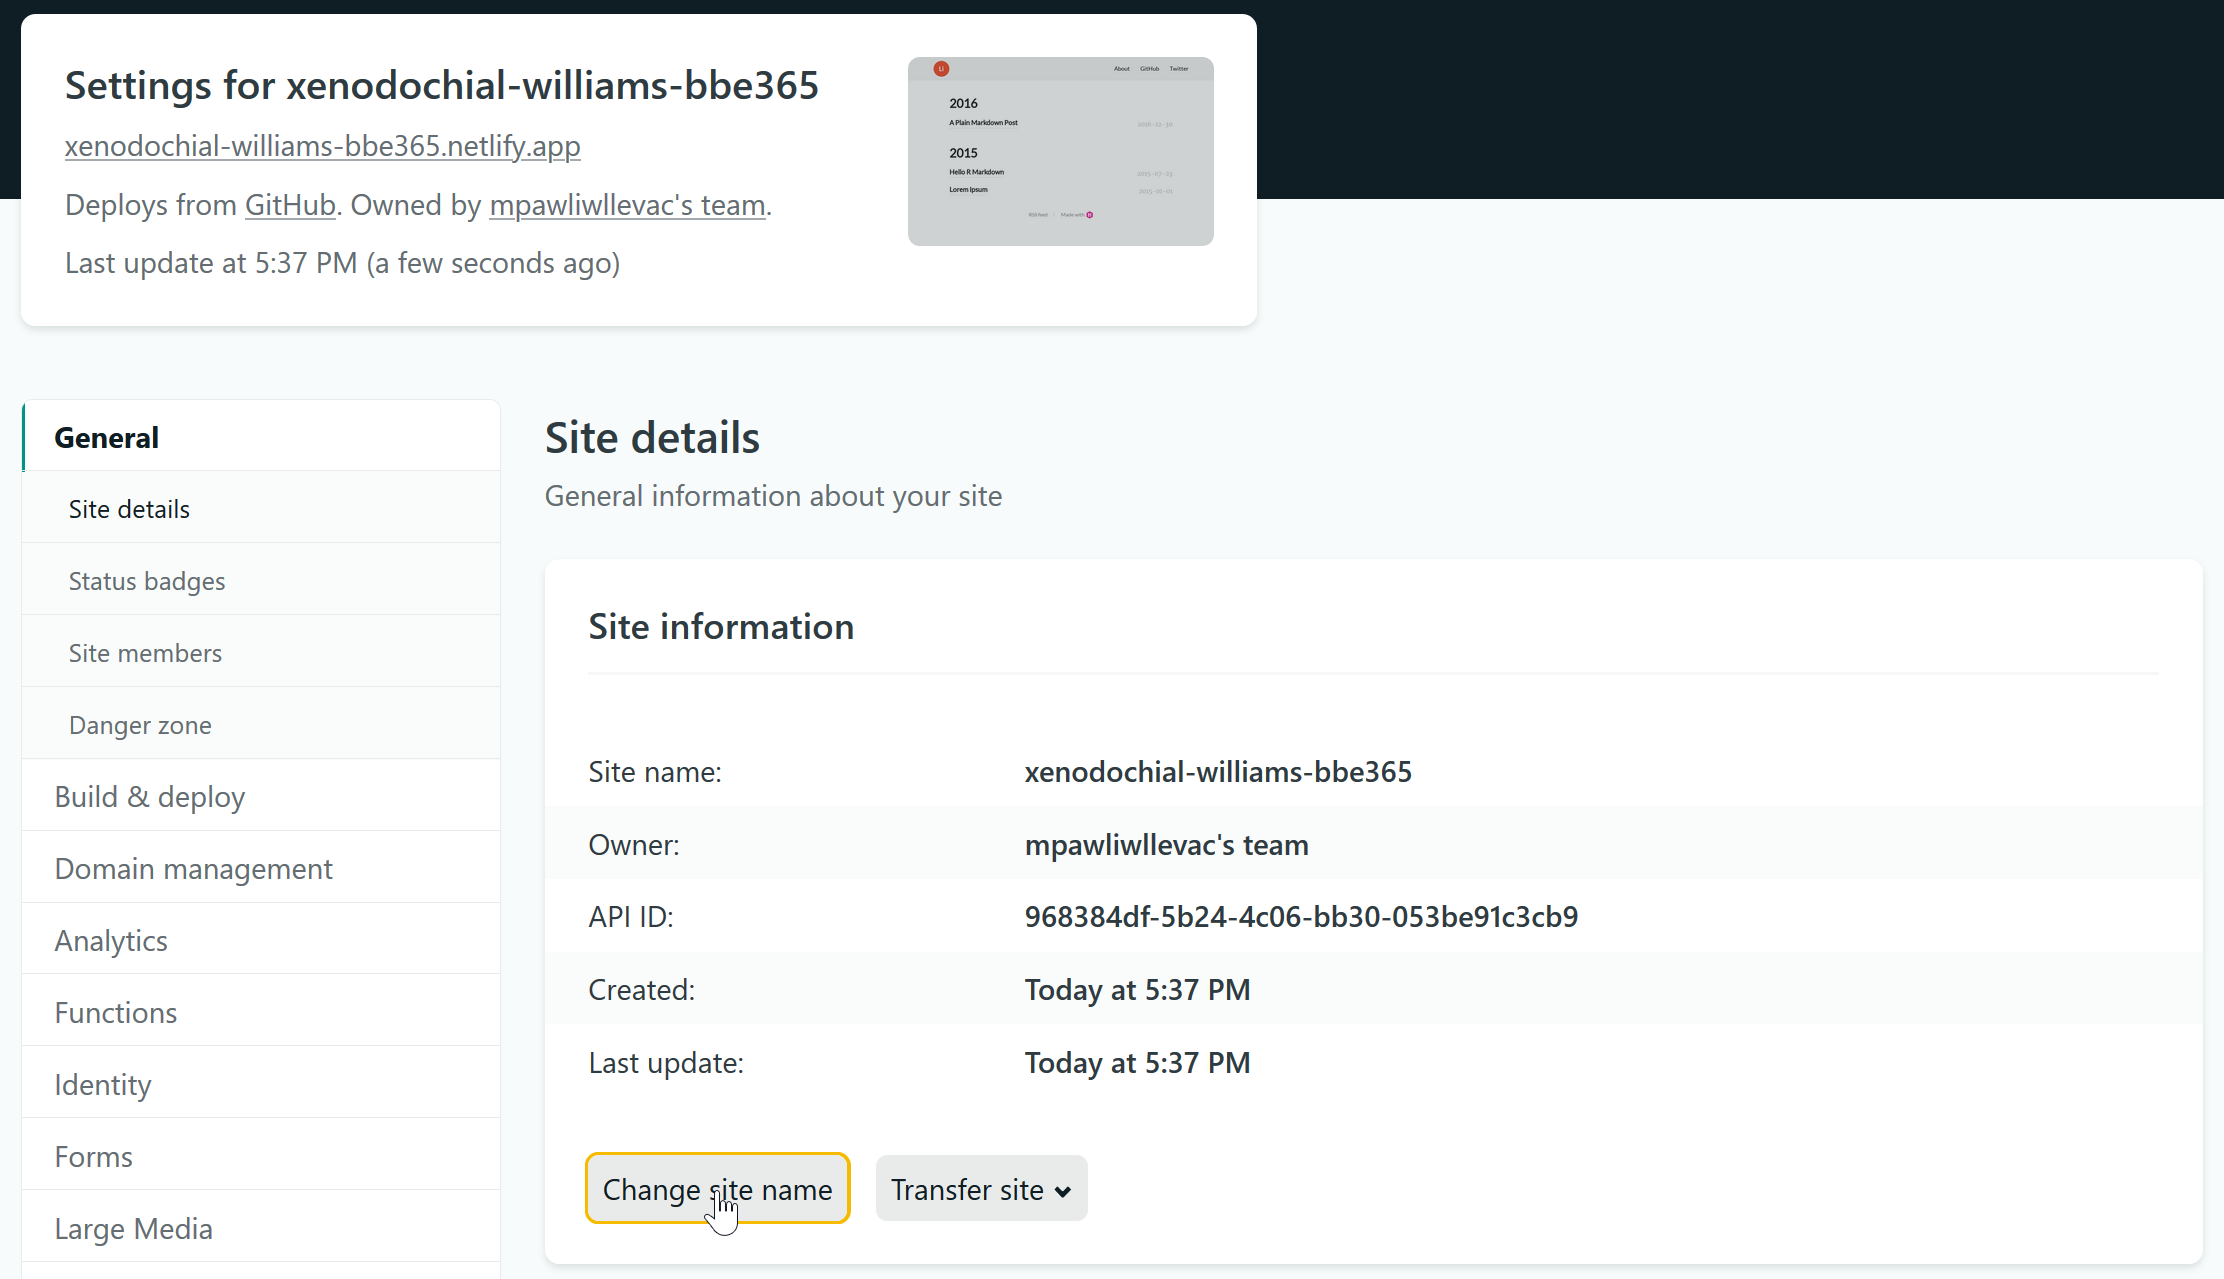
3of3 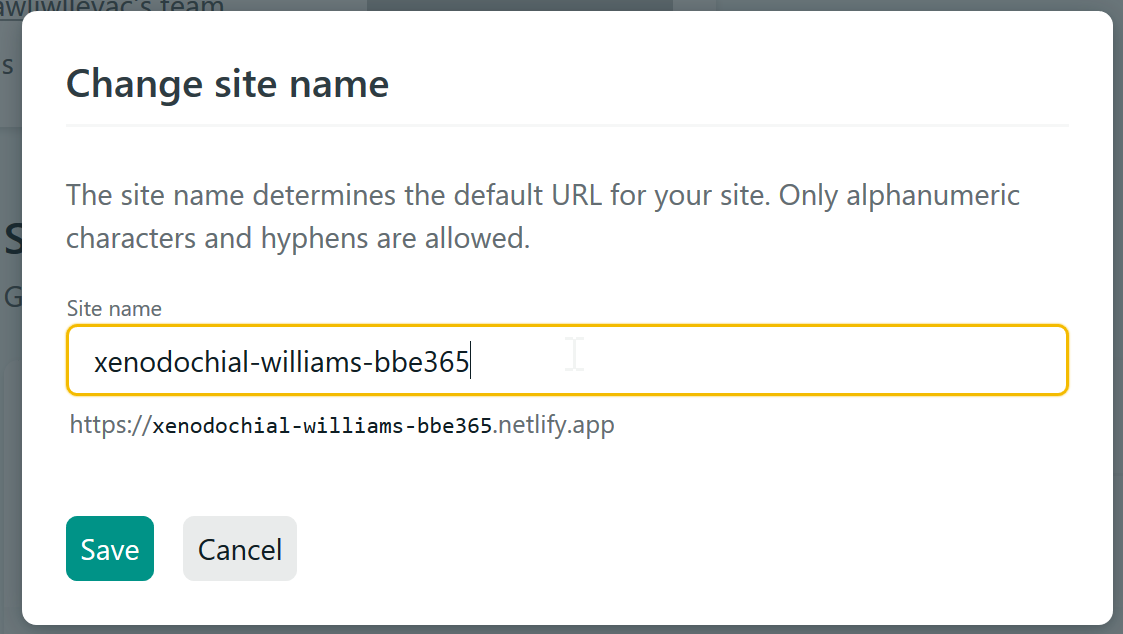
And that’s it. You’re done!
Resources
This is a bonus section and has a bunch of resources and tutorials on blogdown in case people don’t find this site helpful. If you find that I missed something please let me know.
Tutorials
- Create a Website with R Studio in 15 Minutes! by Nathaniel Raley Woodward
- How to make a personal academic website for free using R and the blogdown package by Daniel Quintana
- How to build a website with Blogdown in R by Martin Frigaard
Other resources on blogdown
THE book on Blogdown by: Yihui Xie, Amber Thomas, Alison Presmanes Hill
Up & Running with Blogdown by Alison Hill